Introduction
Davinci AI’s allows you to integrate cloud storages to store results of various media related features of the script. This allows you to make sure that you always have sufficent storage space for your customers. Using cloud storage option also minimizes the latency for your user to access their media results as data could be avaiable via CDN framework of the cloud vendors.Connect GCP Account
To be able to use your GCP Bucket, follow these steps to setup integration.1
Step 1
Go to the Google Cloud Platform page, and get yourself registered in case if you don’t have an account already.
2
Step 2
Once you are logged into your GCP account, click on the New Project button on the top left corner, and provide project name as you prefer.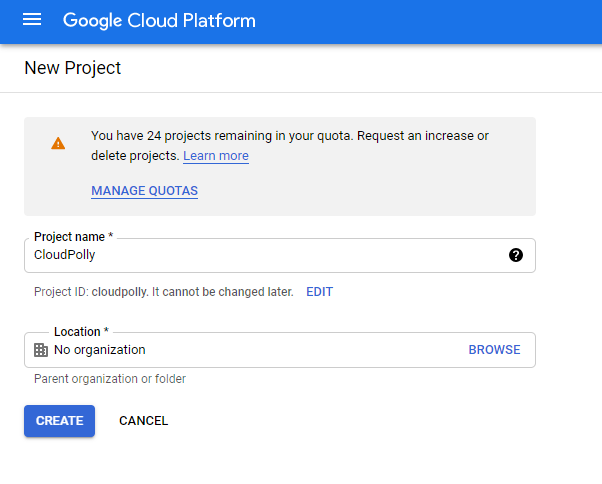
3
Step 3
Next, search for storage keyword and select Cloud Storage from the list.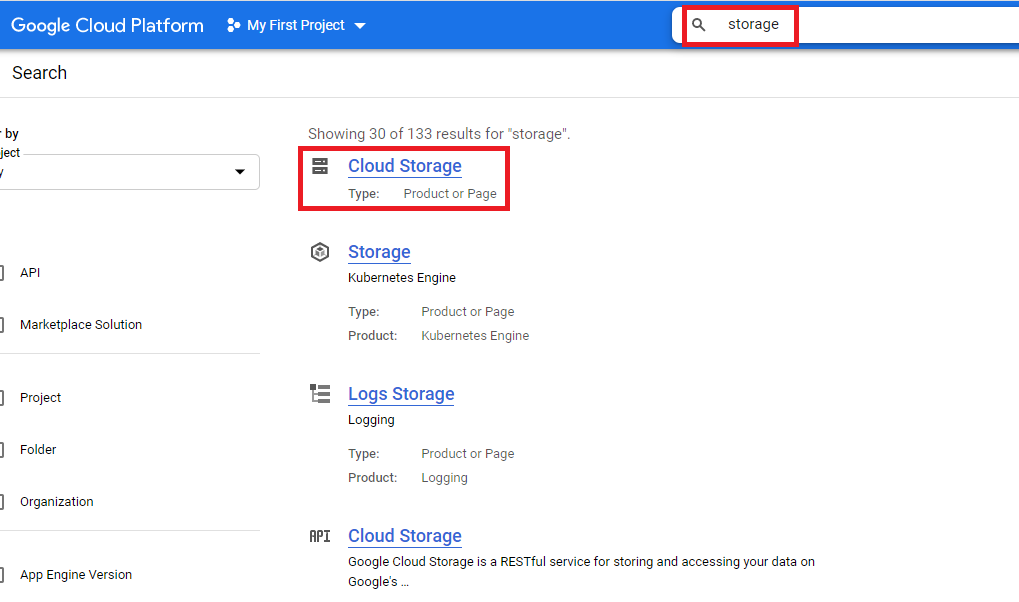
4
Step 4
Within the Storage service click on Create Bucket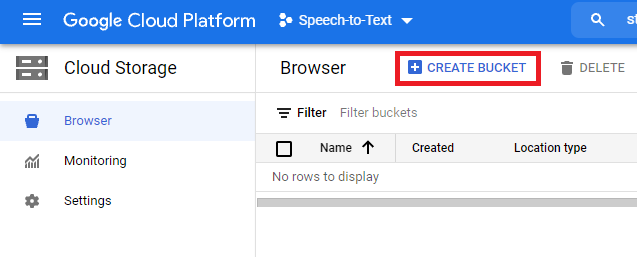
5
Step 5
Specify bucket name as needed and click Create Bucket. Provide unique bucket name. (it must be globally unique, hence you might want to add random digits/letters if needed)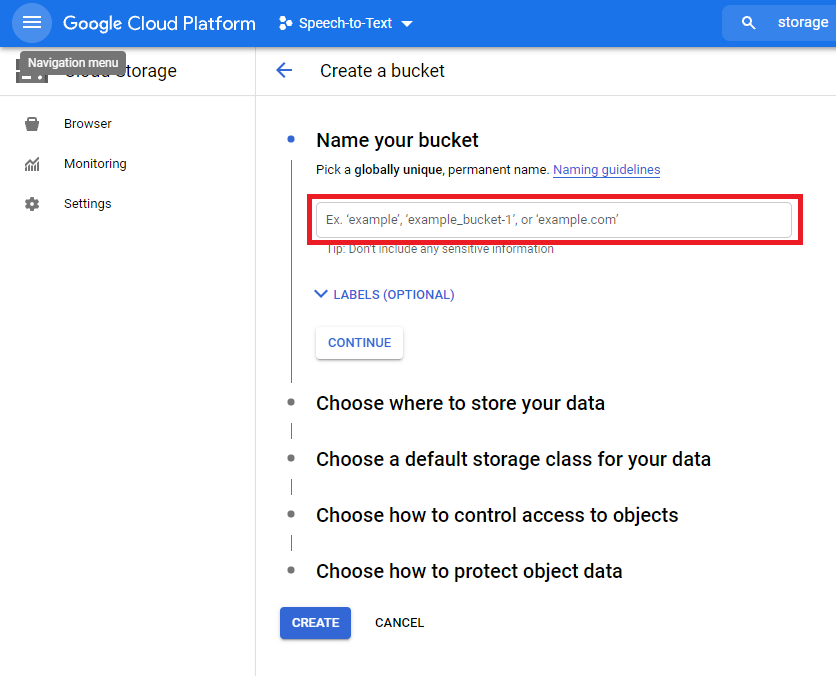
6
Step 6
For the next step select Region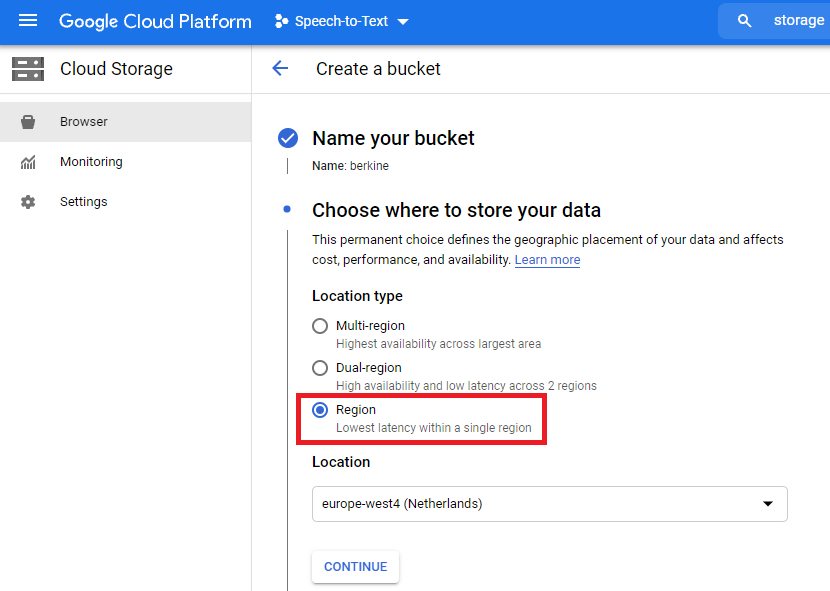
7
Step 7
For the next step select Standard, or if you are familar with GCP storage types you can select alternate options as well as needed
8
Step 8
Set versioning and encryption as needed or leave it with default values.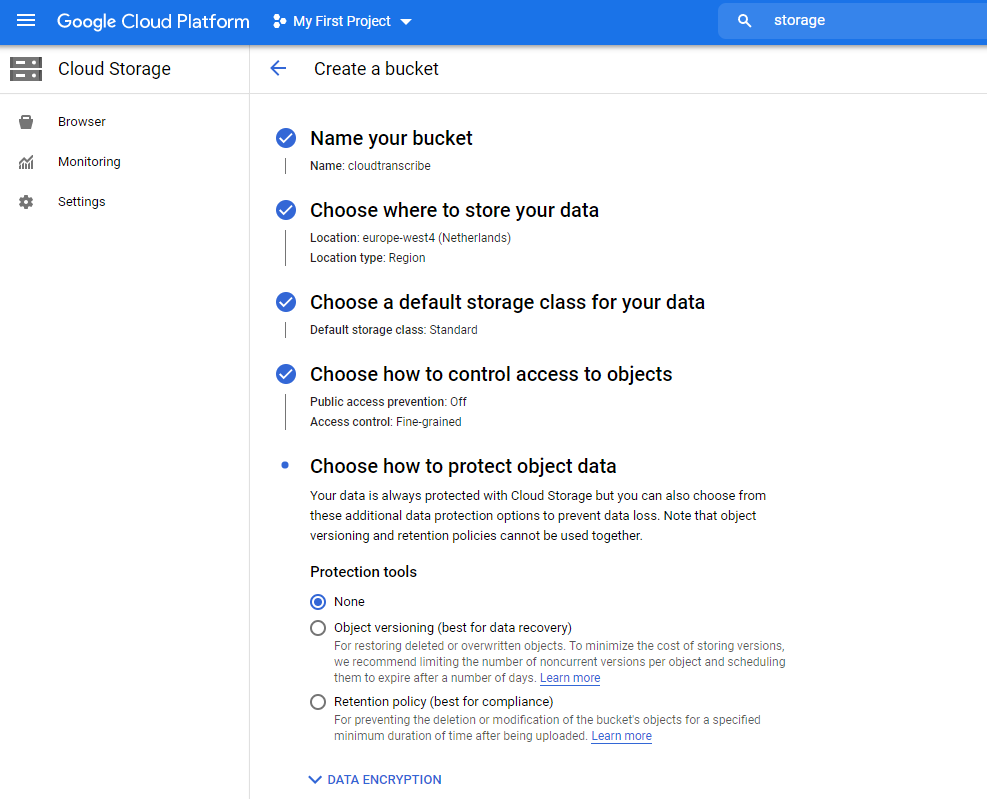
9
Step 9
Select Fine Grained for access control.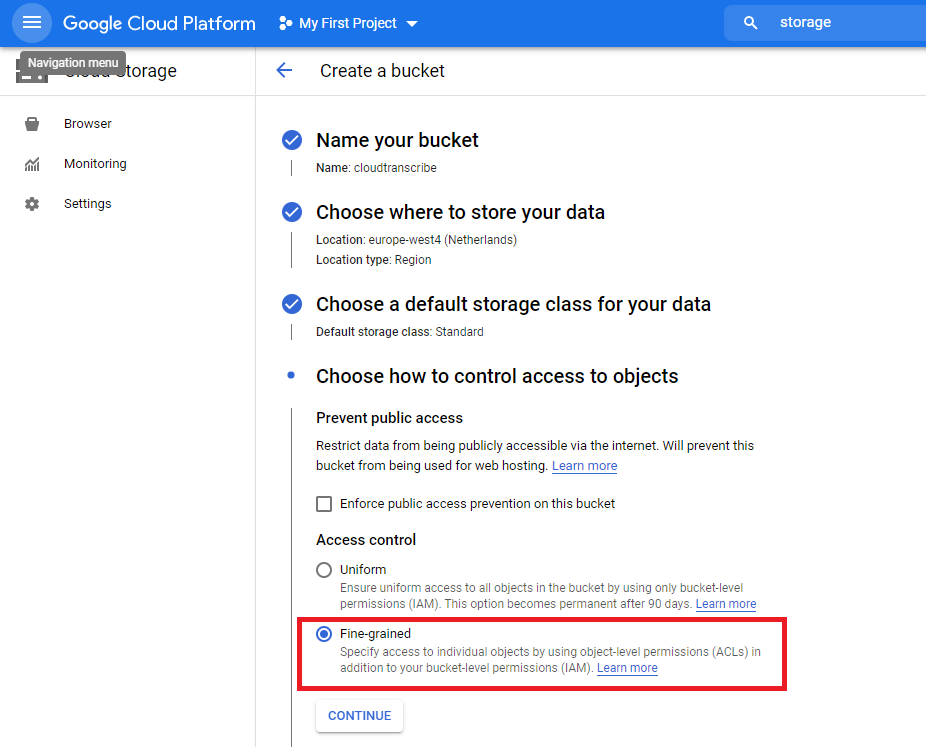
10
Step 10
Now when your bucket is successfully created you need to provide access to that. For that we need to create a Role. Go to IAM & Admin and select Roles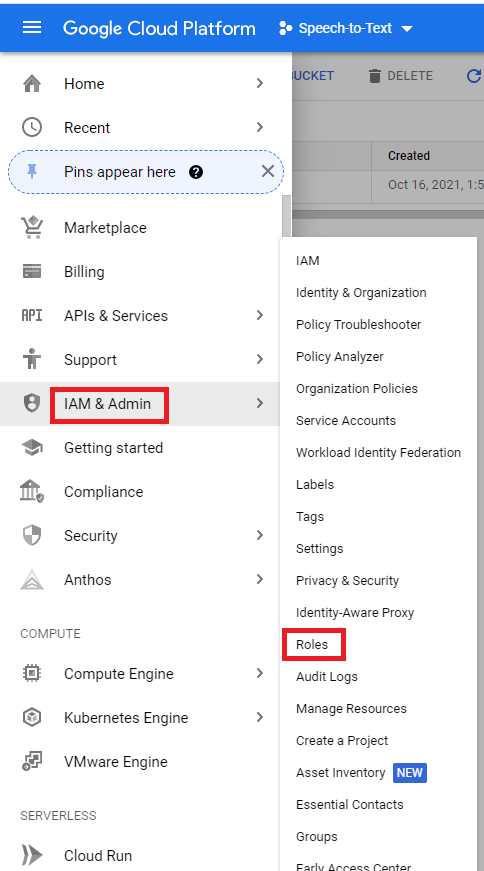
11
Step 11
Click on Create Role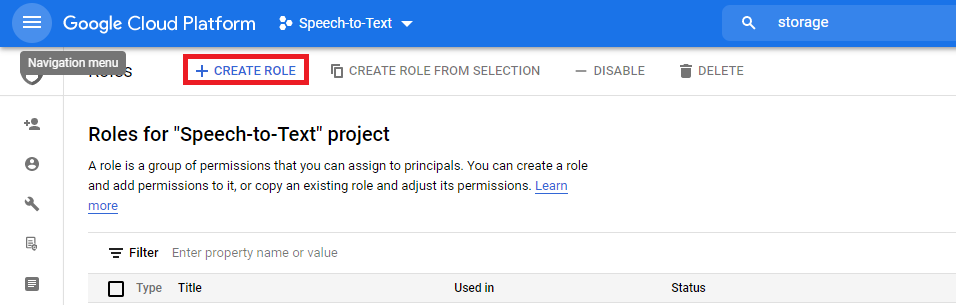
12
Step 12
Provide a Role Title to be able to identify it later.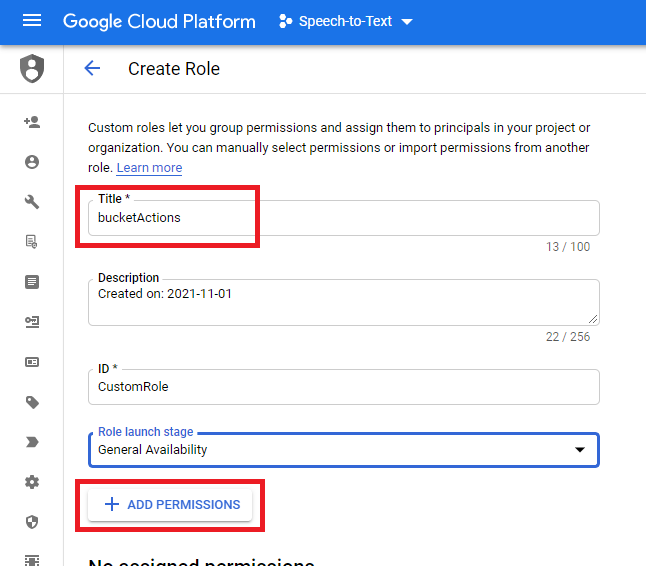
13
Step 13
Click on Add Permissions.
14
Step 14
Search by keyword storage and select storage.bucket.list.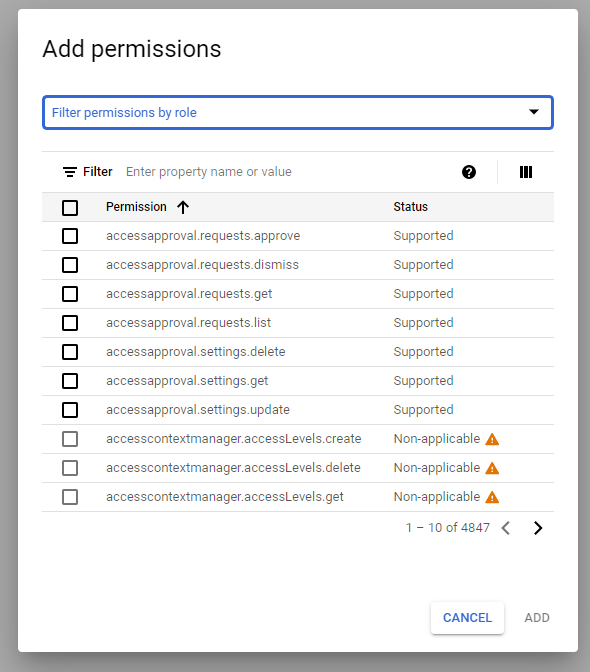
15
Step 15
Also select following object level permissions as well as shown in the image.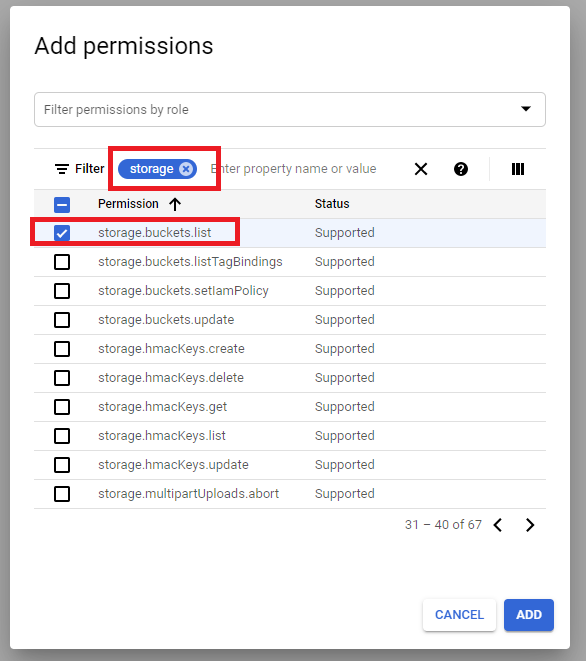
16
Step 16
Final result should look like in the image and click Create.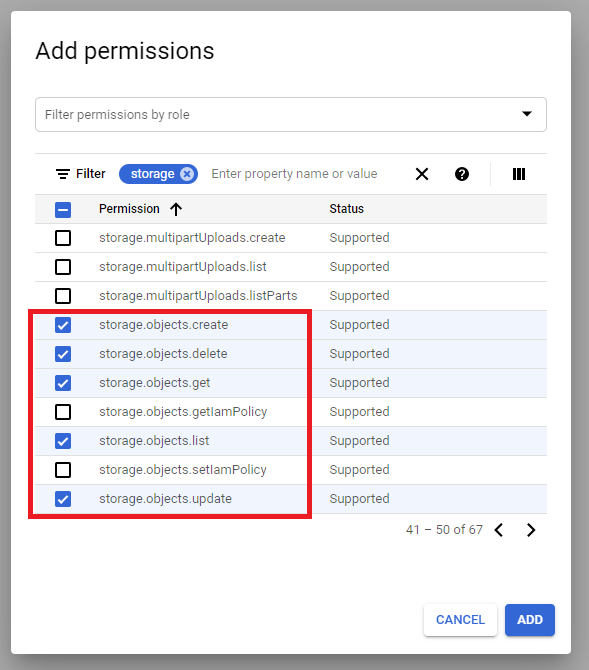
17
Step 17
Now you need to create Create Service Credentials. Go to API & Credentials and click on Create Credentials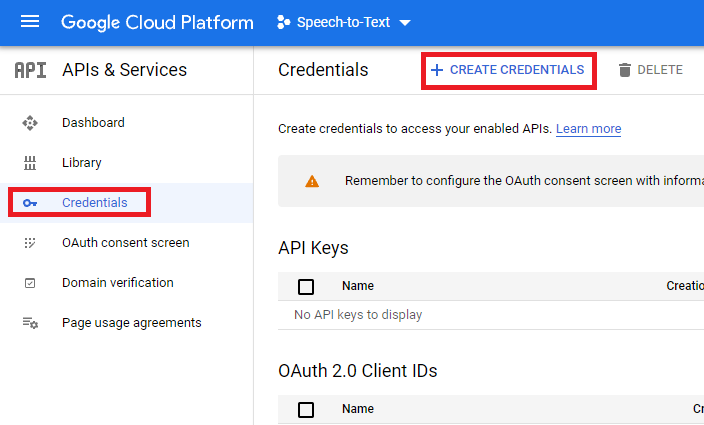
18
Step 18
Click on + Create Credentials and select Service account from the list.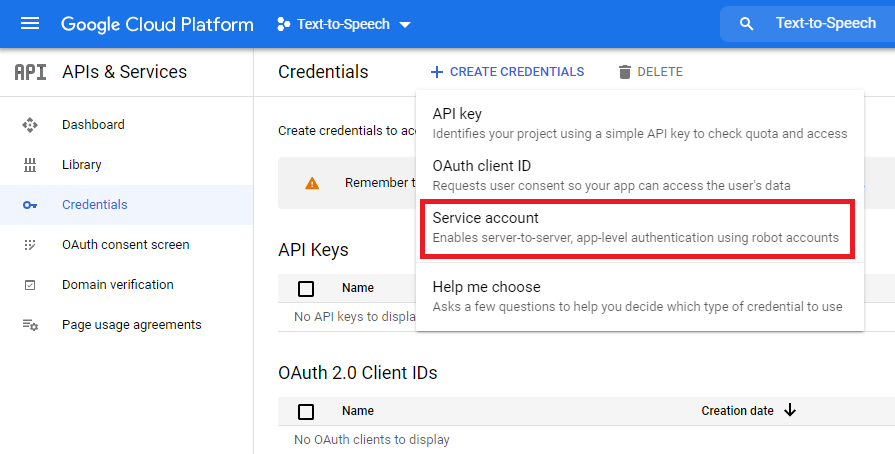
19
Step 19
1 - Provide Service account name and Service account description (optional).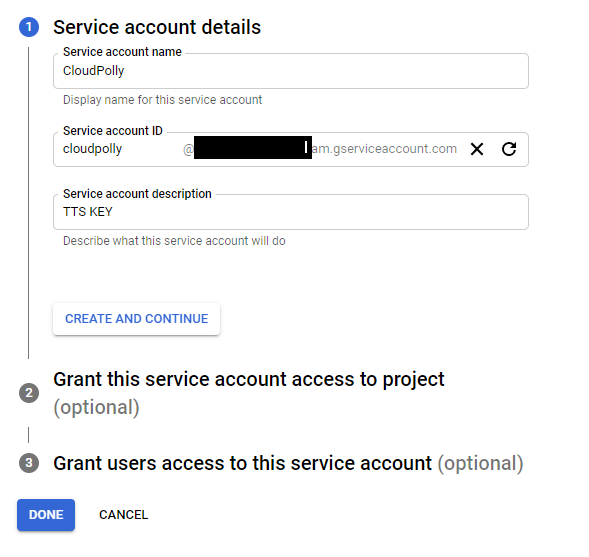
20
Step 20
2 - Click on Select a Role and find your role that you created previously to access GCP Storage Bucket.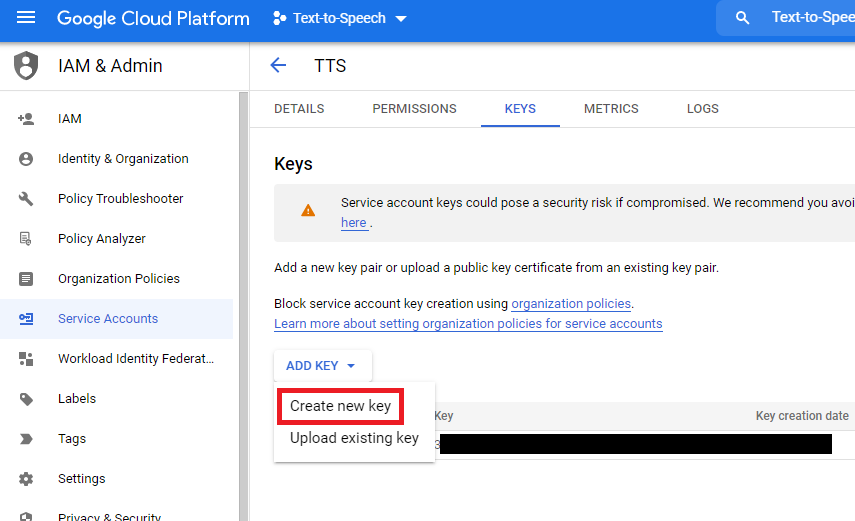
21
Step 21
3 - You can leave this step with defaults unless you want to add addtional user(s) and click Done.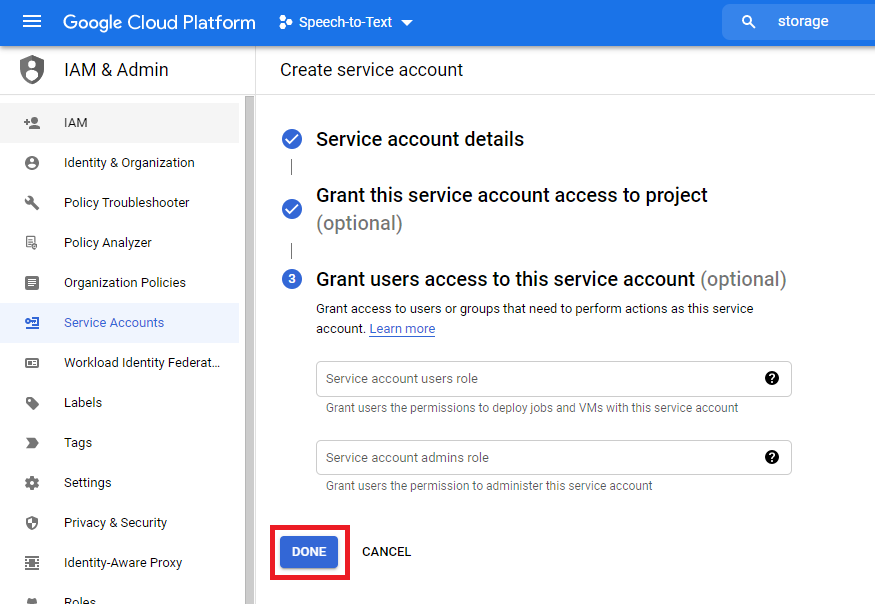
22
Step 22
Select your newly created Service Account, under Actions tab select Manage Keys.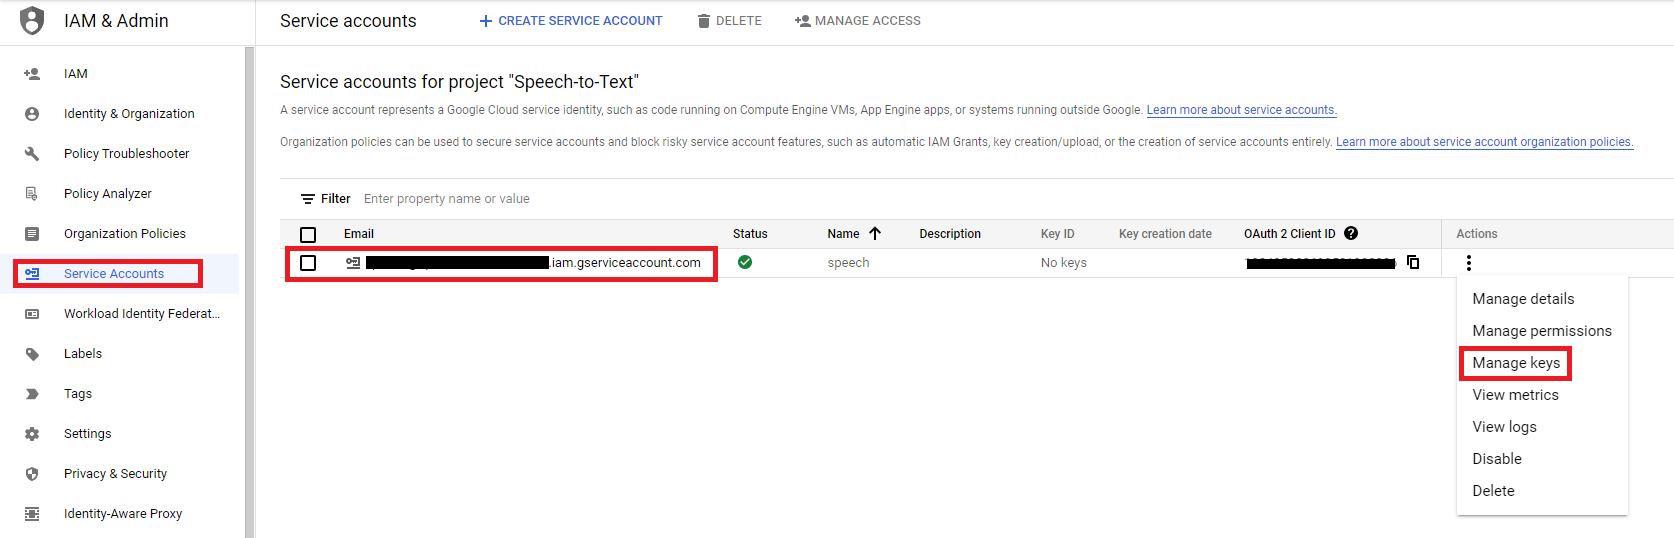
23
Step 23
Under Keys tab, select Add Key -> Create new key.
24
Step 24
Select JSON as key type. Click Create, it will store in on your desktop.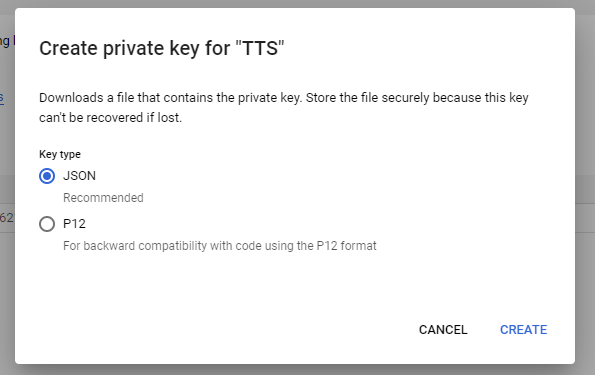
25
Step 25
Now, Login to Davinci AI using your admin credentials.
26
Step 26
In Admin Panel, navigate to AI Settings -> AI API Keys tab.
27
Step 27
Click on Google tab there.
28
Step 28
Include the path for the json file and your GCP bucket name. JSON file must be stored outside of your Public folder. Show full path for the JSON file including JSON filename based on your hosting file structure. Here is an example for cPanel: ‘/home/username/public_html/gcpjsonfilename.json’. Click save button afterwards.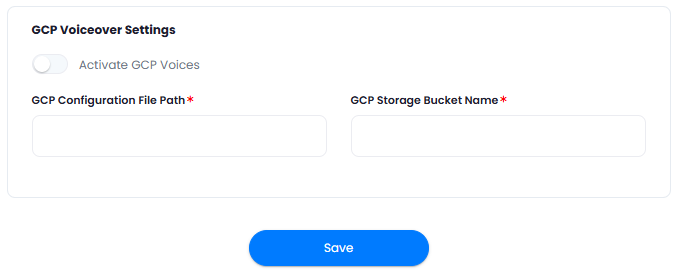
Congratulations! You have successfully comleted the Google Cloud Bucket setup process.
Davinci AI Tools which supports storing results in GCP Bucket
Following AI tools can be store results in Google Cloud StorageSupport for more AI tools will be added soon, we are actively working on that
- AI Voiceover
- AI Images
- AI Speech to Text
Via AI Settings page in Admin Panel, you can set default cloud storage vendor for each of the supported AI tools individually