Introduction
Whatsapp extension enables the integration of external chatbots with Whatsapp, facilitating a seamless and secure messaging experience on a reputable and widely utilized platform. Have your chatbots fully trained to take care of your Whatsapp bots efficiently as you prefer. Your bot adeptly manages conversations. Add your Whatsapp channel with just a few clicks and you are fully setup. Please note: This extension requires to have External Chatbot extension.Extension Configuration
To be able to use Whatsapp Bot feature, follow these steps to setup Whatsapp Extension.Step 1
Go to the Marketplace in Admin Panel and install Whatsapp extension after successfully purchasing it first.
Step 2
After installation is completed, go to AI Settings page in Admin Panel and click on Extensions tab there. Click on Whatsapp there.
Step 3
Whatsapp extension settings page is the main configuration of this extension.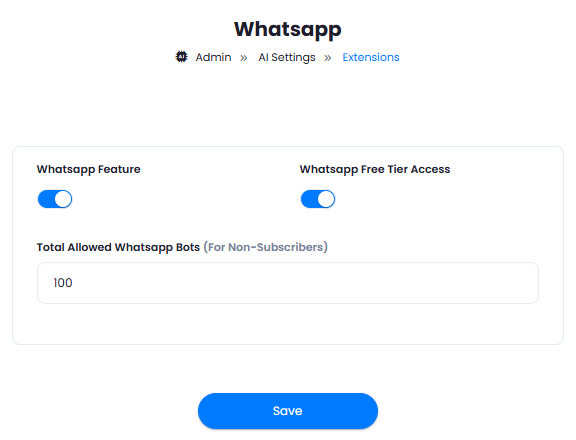
- You can control the maximum allowed whatsapp bots under Total Allowed Whatsapp Bots field, this value will be applicable to all users who are not subscribed to any subscription plans. You can also set custom values as needed in the Subscription plans, and those limits will apply to the subscribers of that plan.
- Turn on the checkboxes for Whatsapp Feature and Whatsapp Free Tier Access
If you don’t turn on Whatsapp Free Tier Access, then users who did not subscribe to any subscription plan where you have Whatsapp feature enabled, will not have any access to this feature
- After you are done with configuration, click the Save button.
How to Use
After properly configuring your Whatsapp settings, you can start including your Whatsapp Channels into your External Chatbots, for that, go to External Chatbot extension in the User Panel.- Create your External Chatbot as needed, which is explained here
- Under the Step 5 you will see a new Channels feature. Click on Whatsapp from there.
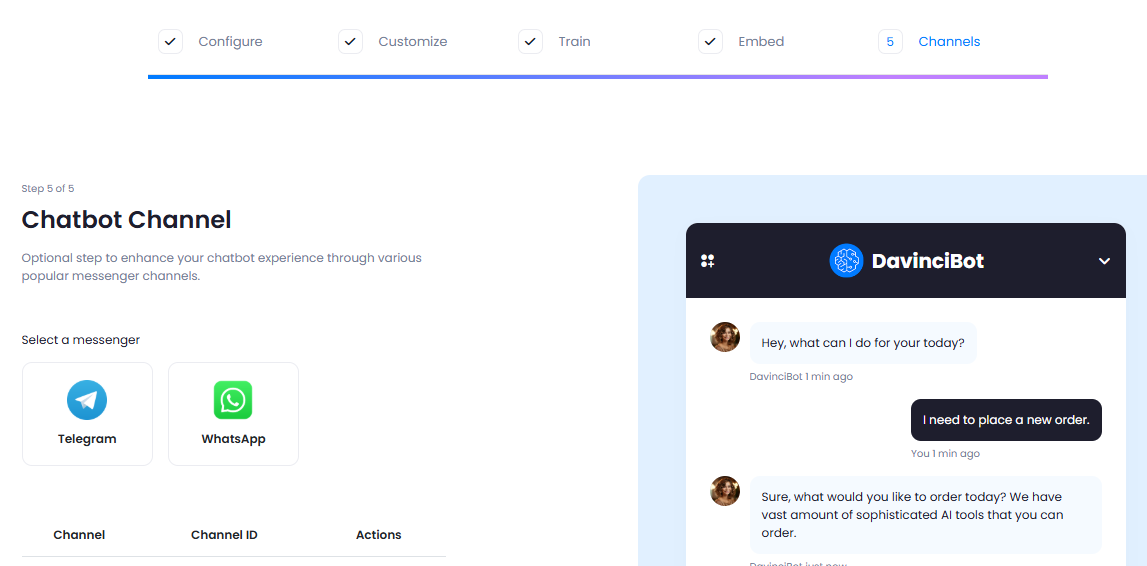
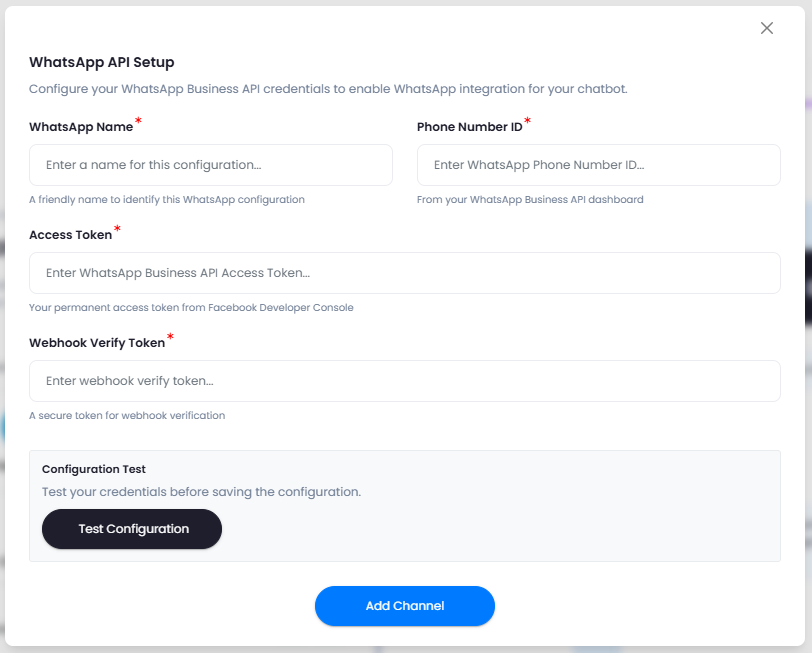
- Now enter your Whatsapp Bot Name to identify it later, Phone Number ID and your Access Token, and Webhook Verify Token. If you don’t know where to get them, refer to the Whatsapp Business API section below, it explains on how to configure your Whatsapp Business API. After entering your data, click on Add Channel button.
After entering your Whatsapp credentials, you can use
Test Configurationbutton to check your entered credentials are valid or not
Whatsapp Business API
The following are the steps for getting your Whatsapp Phone ID, Access Token and rest of the required inputs for whatsapp settings:- Sign up for a Meta Developer Account
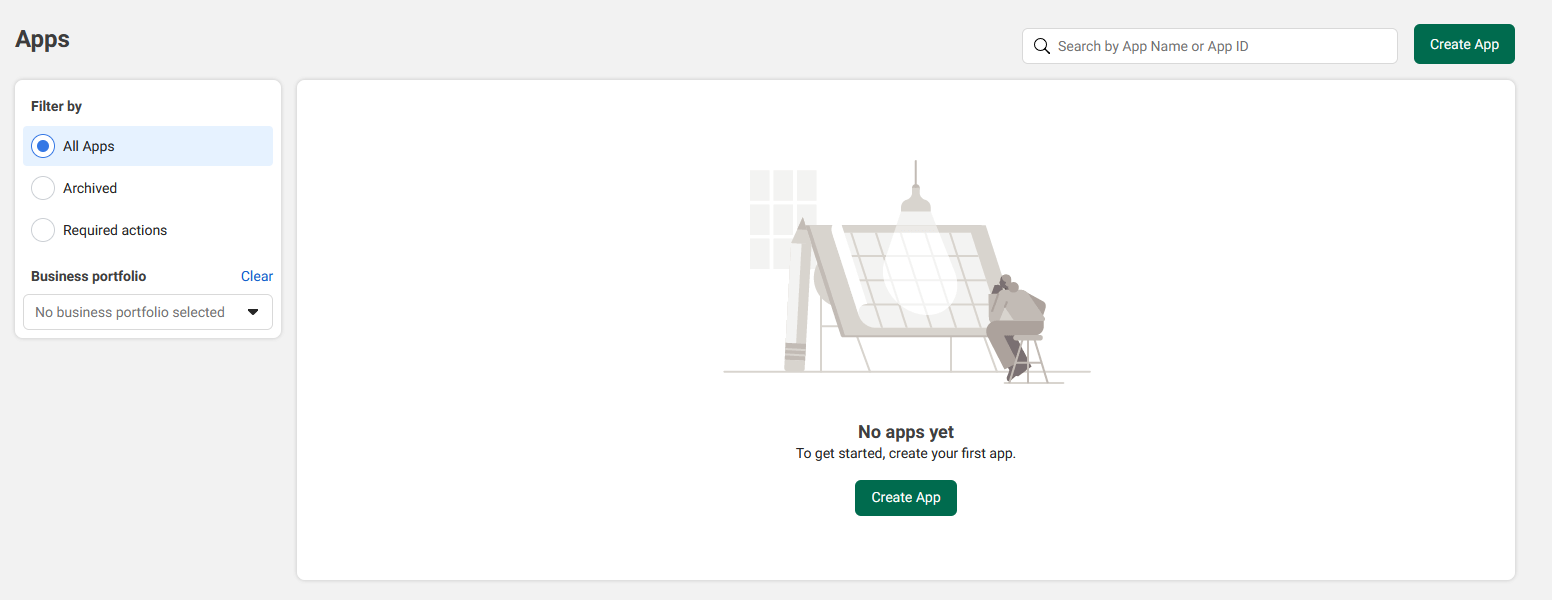
- Create a Meta App. Once you are logged in, click on My Apps and click Create App button.
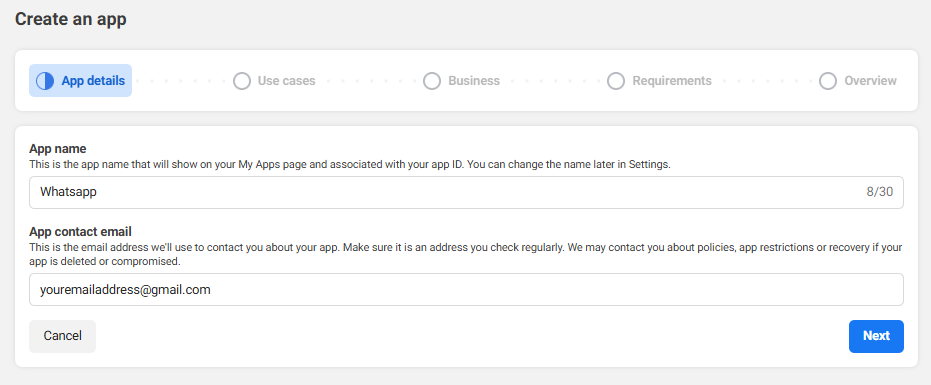
- Once app creation wizards starts, at App details section, provide App name and App contact email details as preferred. Click on Next button afterwards.
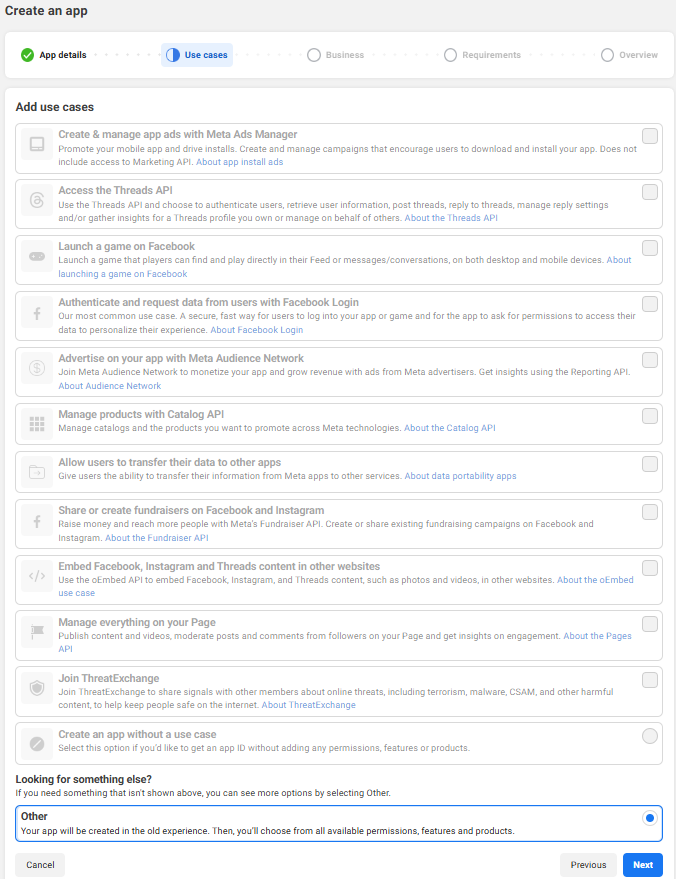
- At the Use Cases section, select Other and click on Next button.
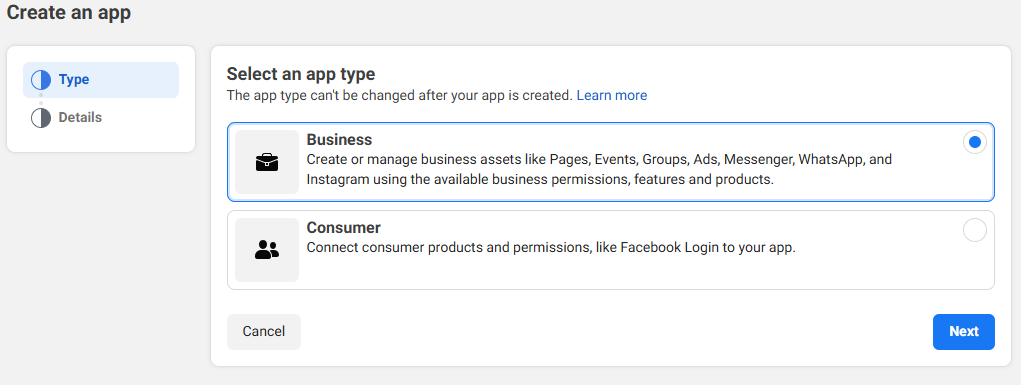
- Next, for the App type, select Business and click on Next button.
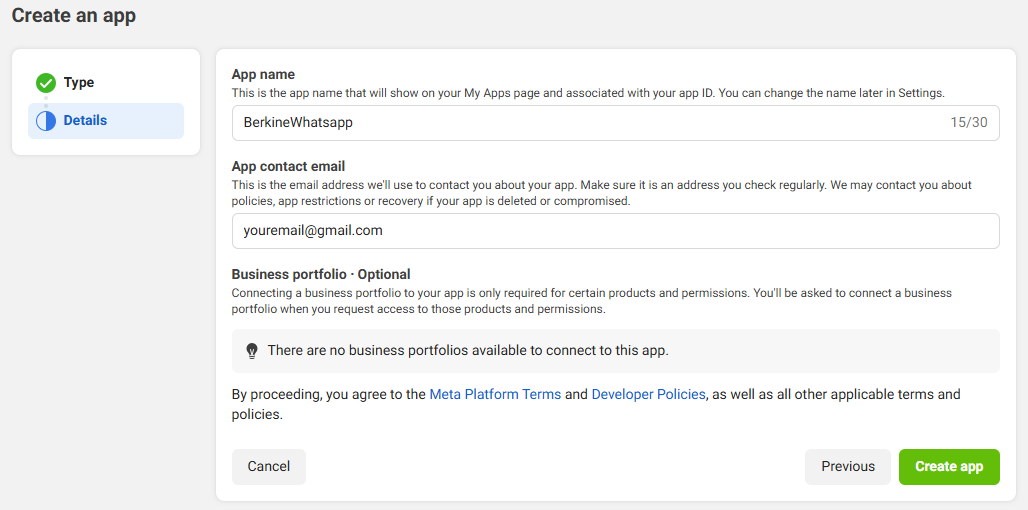
- Next, check your app name and email address and select your Business Portfolio, in case if you haven’t created one, you need to created one. You will be asked to create one when you will add Whatsapp product. Click on Create App button.
- Next, add Whatsapp product to your app, click on the Set up button next to Whatsapp.

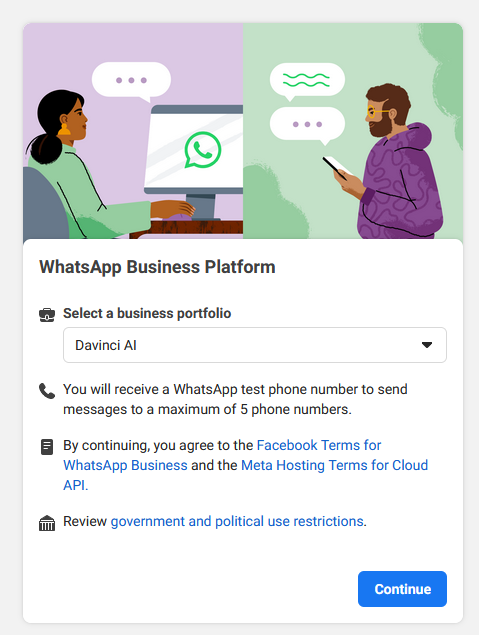
- It will ask you to select your Whatsapp Business Portfolio, if you don’t have one, you can click on the learn more link there, or follow this official meta tutorial on it.

- Once you have created Whatsapp Business Portfolio successfully, return to step 7, and click on set up button. This time you will be able to select your newly created Business Portfolio, select it and click on Continue button.
- Next you will be redirected to Whatsapp Quickstart page, click on the Start Using the API button.
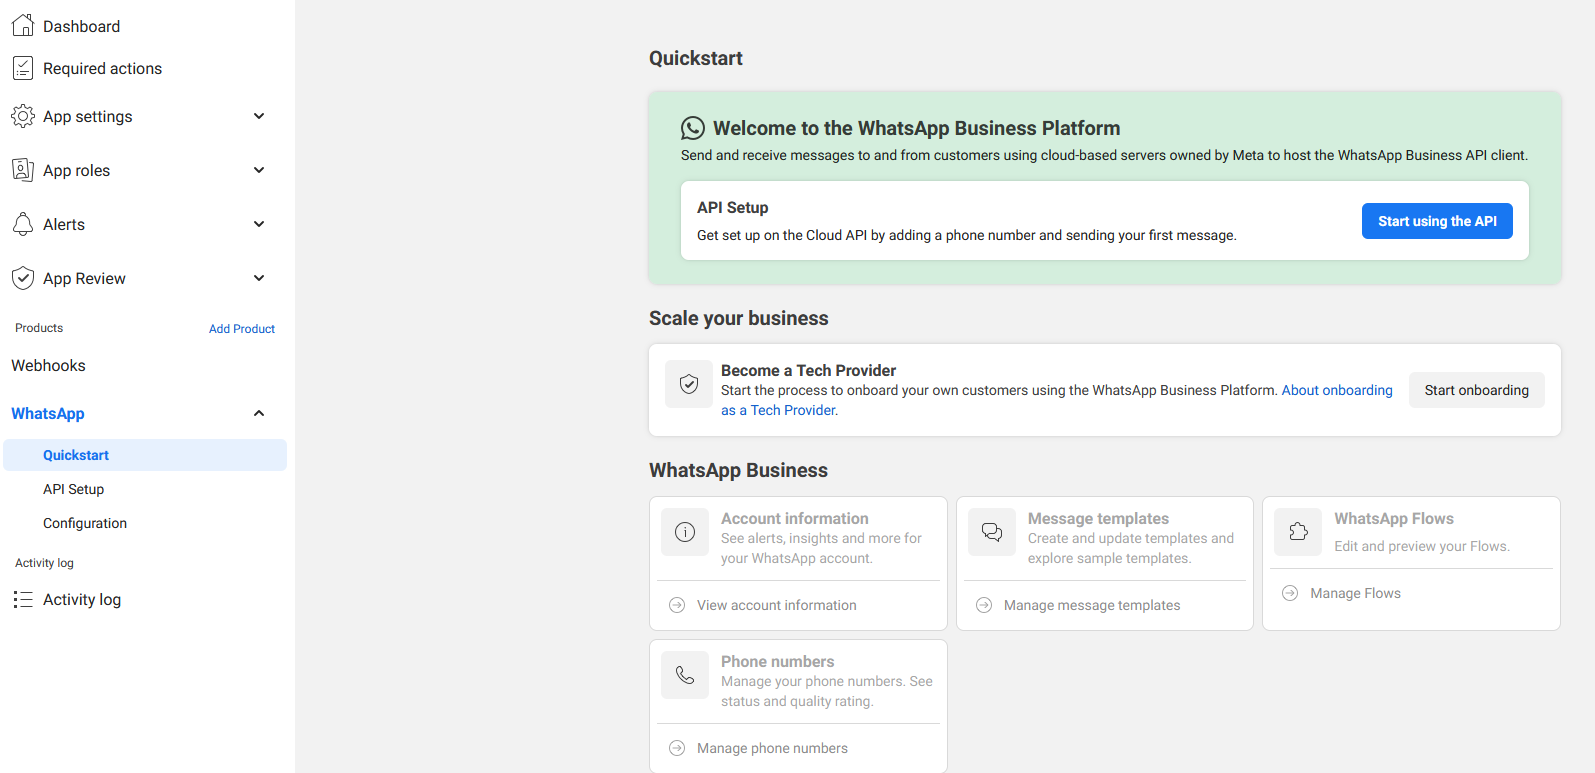
- From here, you can generate you Access Token, add phone numbers and webhooks and do further setup as needed.
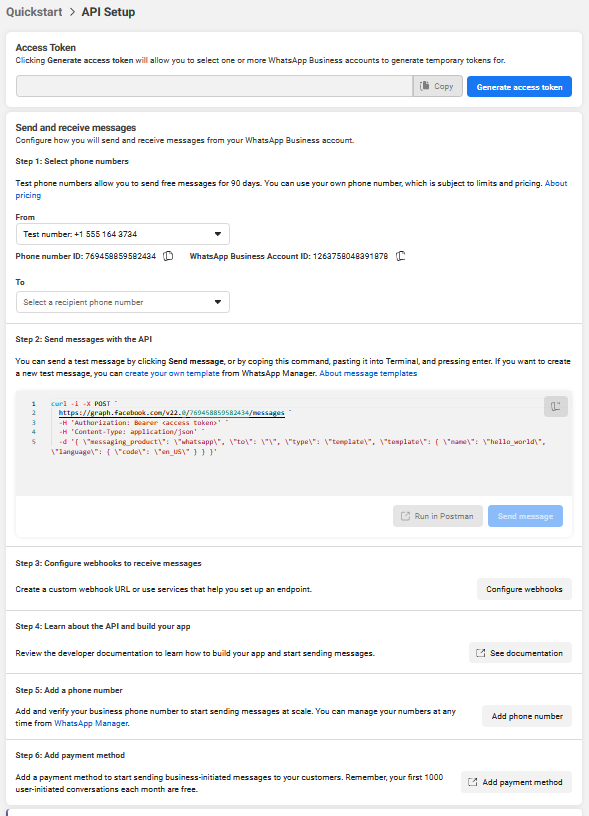
- In Step 1 - Add your phone number in the From field and copy your Phone Number ID. You can put some numbers into To field to do some testing as needed.
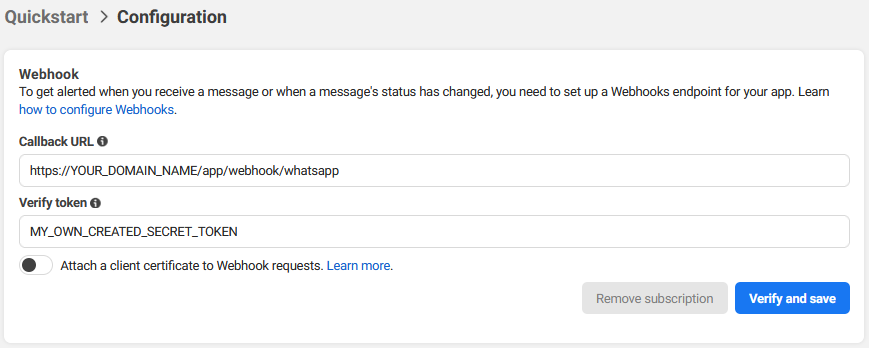
- In Step 3 - Click on Configure Webhook button.
- For Callback URL - include:
- For Verify Token - enter your own preferred string, it must be at least 8 characters.
- Once done, click on Verify and Save button.
Before setting up callback url, make sure that you have installed the Whatsapp extension in the Davinci AI

- Rest of the steps are fully up to you to set, such as billing etc, they are not covered by us as does not play any role in the API itself, but they are important to have your Whatsapp Business Account to run smoothly and that you don’t hit any of the Meta rate limits.
- Now, copy paste your Phone Number ID, Access Token, Webhook Verify Token into Whatsapp Channel in Davinci AI and click on Add Channel button.
- This completes the Whatsapp Business Account setup.