Introduction
AI Textract automatically retrieves text, handwriting, and data from scanned documents, surpassing basic optical character recognition (OCR) by interpreting and extracting information from forms and tables. Unlike many organizations that rely on labor-intensive manual extraction from PDFs, images (PNG | JPEG), tables, and forms — or use basic OCR tools requiring frequent manual adjustments—AI Textract employs machine learning to process any document type efficiently, delivering precise results without human intervention in mere minutes rather than hours or days. Additionally, its Receipt Analyze feature can detect vendor names embedded in logos without explicit labels and extract items, quantities, and prices even from unstructured line items lacking column headers.Extension Configuration
To be able to use AI Textract feature, follow these steps to setup AI Textract Extension.1
Step 1
Go to the Marketplace in Admin Panel and install AI Textract extension after successfully purchasing it first.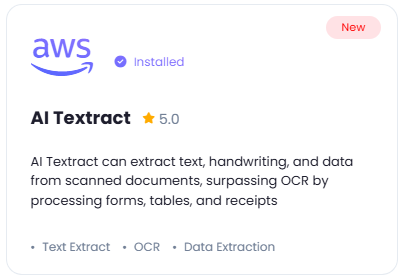
2
Step 2
After installation is completed, go to AI Settings page in Admin Panel and click on Extensions tab there. Click on AI Textract there.
3
Step 3
You will need to include following required AWS credentials:
To create IAM user with Access Key and Secret Access Key refer to the AWS IAM User Creation intructions below.
To create Amazon S3 bucket, refer to this page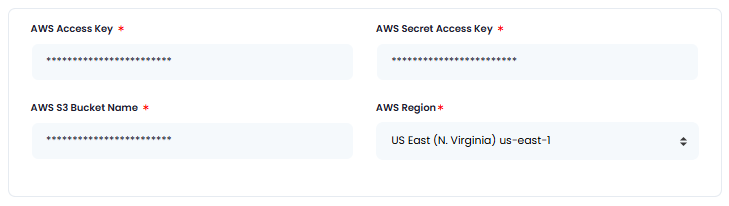
- AWS Access Key
- AWS Secret Access Key
- AWS S3 Bucket Name
- AWS Region
To create IAM user with Access Key and Secret Access Key refer to the AWS IAM User Creation intructions below.
To create Amazon S3 bucket, refer to this page
4
Step 4
Next, turn on the checkboxes for AI Textract Feature and AI Textract Free Tier Access
You have also full control on the maximum file sizes that are allowed, which are PNG | JPEG | PDF and also control how much media credits are needed to process each task.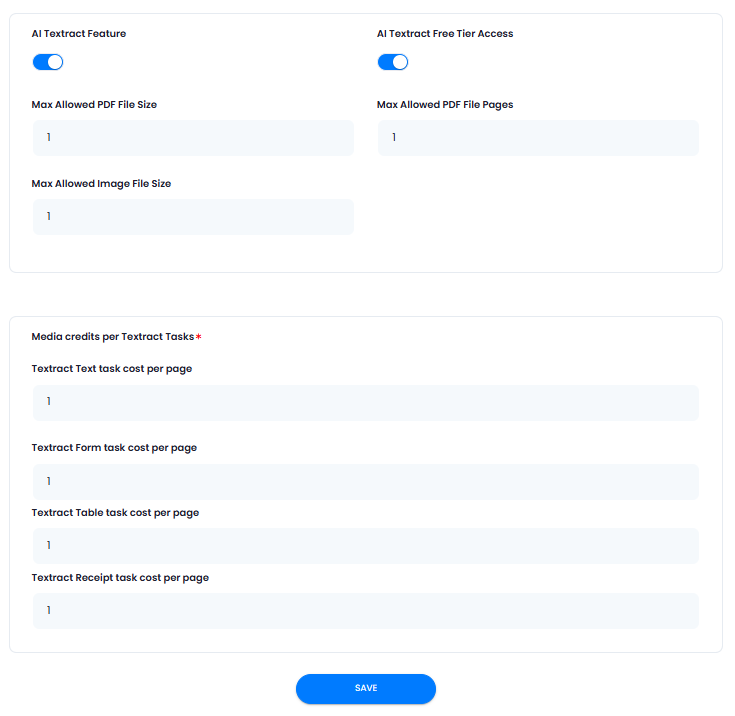
If you don’t turn on AI Textract Free Tier Access, then users who did not subscribe to any subscription plan where you have AI Textract feature enabled, will not have any access to this feature
5
Step 5
After you are done with the configuration, click on the Save button.
6
Step 6
Congratulations! You have successfully completed the AI Textract extension configuration. Proceed to the section below on how to use it.
AWS IAM User Creation
By default all access to IAM users are denied, except for the root user. Make sure to keep your root user credentials in a secure place, you don’t need them for Davinci AI.1
Step 1
Sign in to the AWS Management Console and open the IAM console.
2
Step 2
Once you are at the IAM service page, in the left navigation pane, choose Access management -> Users and then click on Create User button.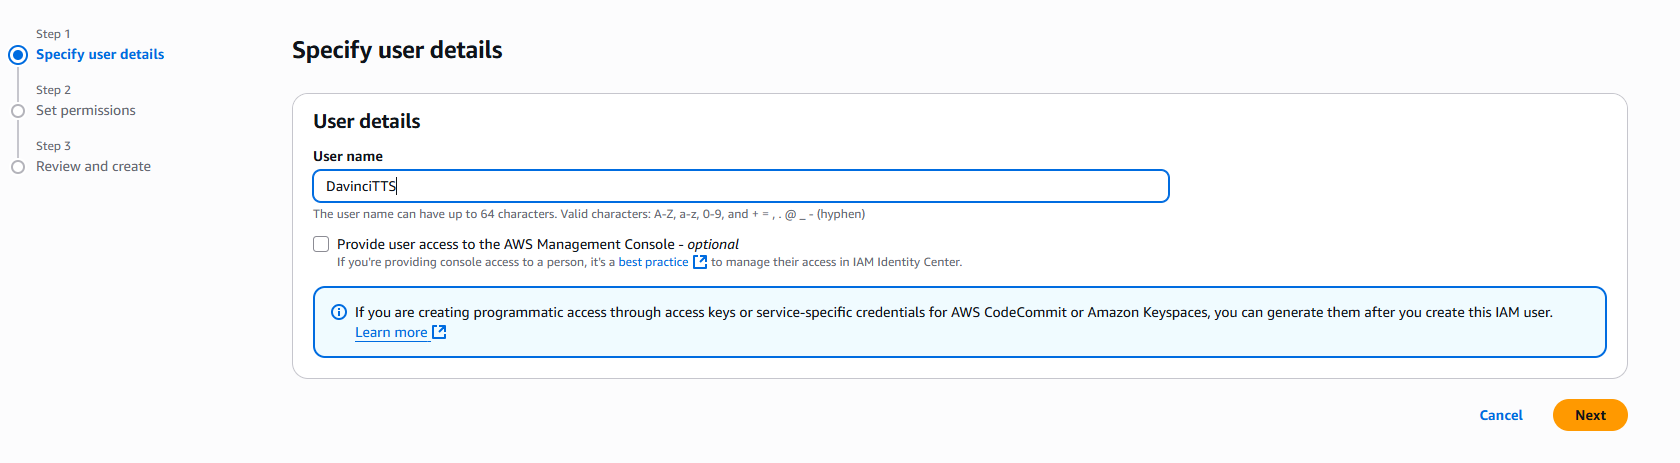
- Provide User name as needed, and click on Next button
- On the Set permissions page, specify how you want to assign permissions to this set of new users. Choose Attach policies directly option. It will show you all the availalbe policies.
Select and add following 2 policies:
- AmazonS3FullAccess
- AmazonTextractFullAccess
Click on Next button afterwards
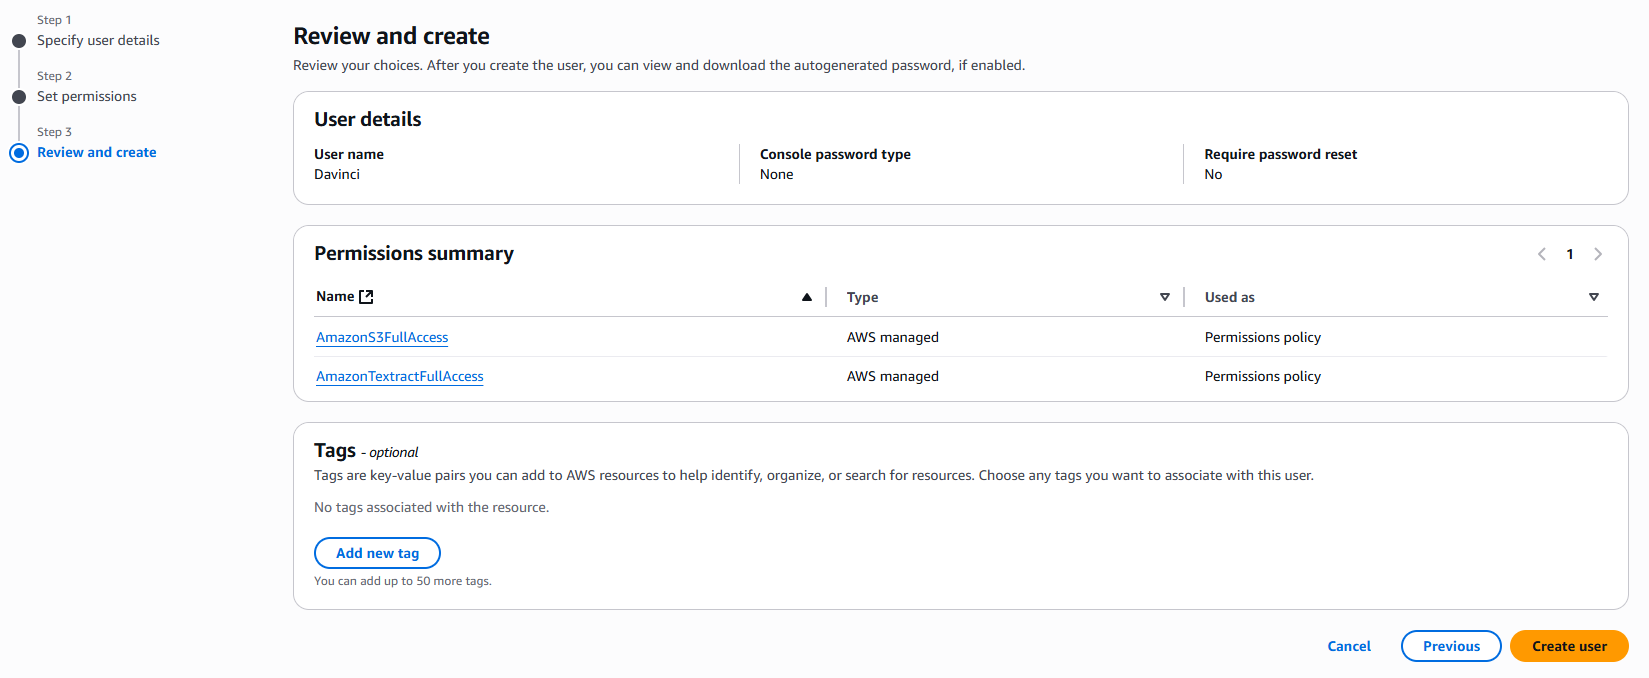
- On the Review and create step, you should see following policies being added. Click on Create User button.
3
Step 3
Once you have created a new IAM user, he will be available at the Users list. Click on your newly created user. You will be shown full details of that newly created user. Next:
- Select the Security credentials tab
- And click on Create access key button
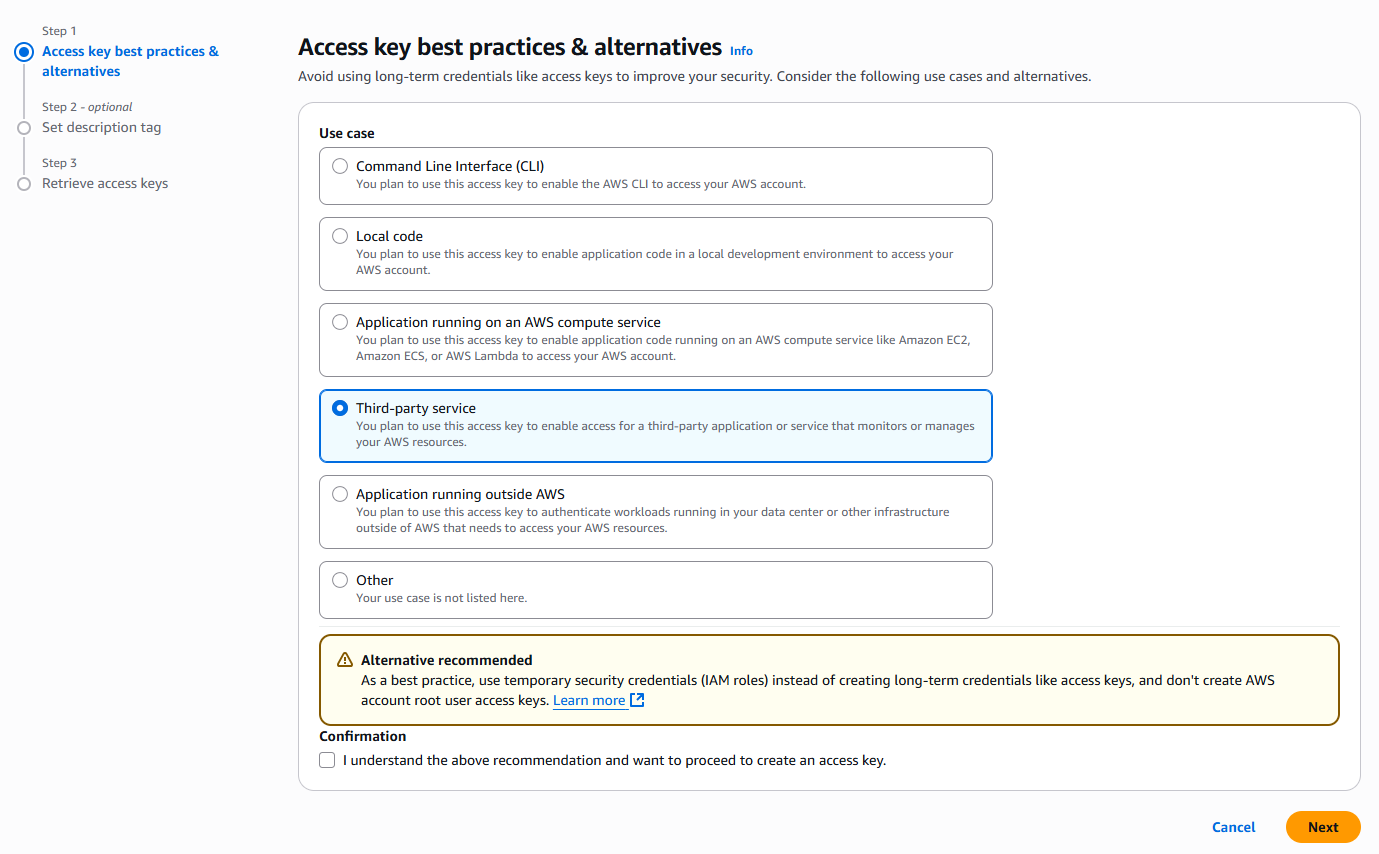
- Select Third-party service from the list and click on Next button.
- Copy your Access Key and Secret Access key and store them in a secure place.
4
Step 4
Next, go back to Step 3 of Extension Configuration section above and continue.
5
Step 5
You have completed the AWS IAM creation process.
How to Use
Using AI Textract is an easy task. You can extract text and data from PNG | JPEG | PDF files. Simply select and upload your target file and click Get started:- After successful installation and configuration of AI Textract extension, go to the User Panel and click on AI Textract tab.
- Next, select and upload your target document
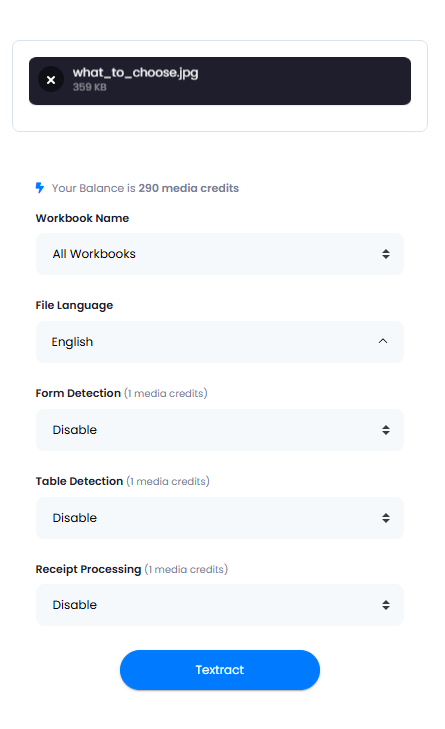
- You can set optional features as well, such as:
- Workbook Name
- File Language
- Form Detection in case if you will have forms in your file
- Table Detection in case if you will have any tables in your file
- Receipt Processing in case if the file you want to upload is a scan copy of a teceipt
- Next, click on Textract button, it will start the anylyzing process
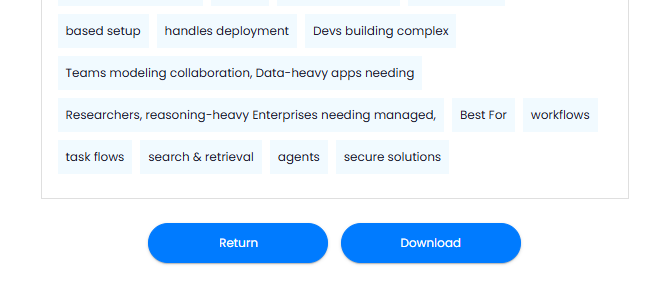
- Once processing is completed, results will be available under Textract Tasks section.
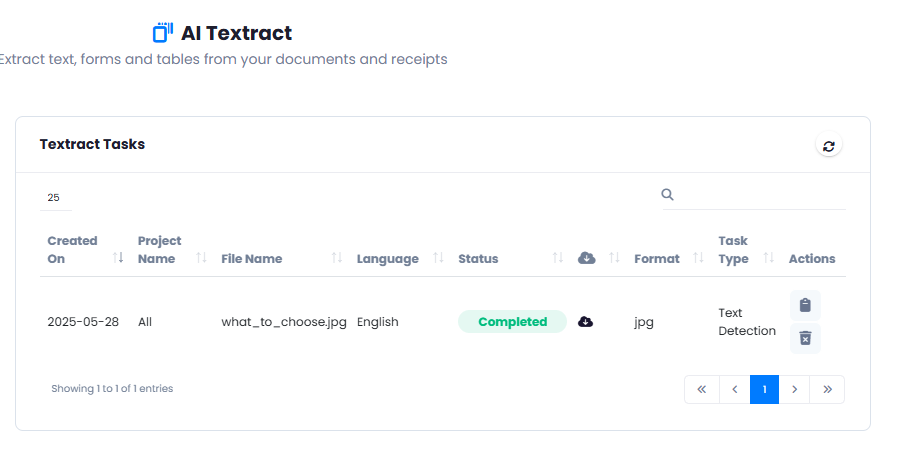
- You can click on the View icon as well, and you will be shown the result.
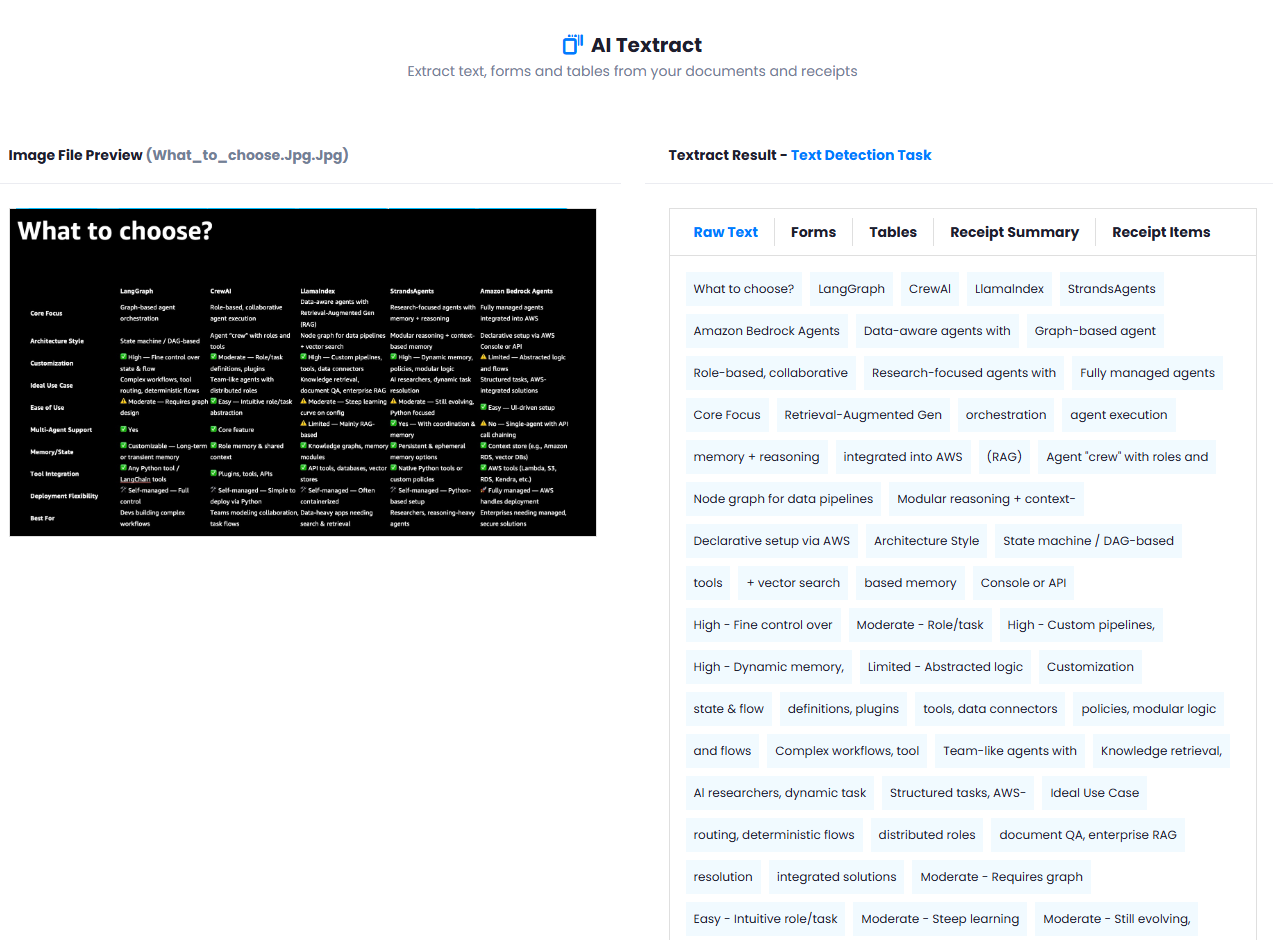
- You can also download the results in CSV format and in row JSON formats.
Congratulations! You have successfully processed your first document with AI Textract.