Subscription Plan creation
To create subscription plans follow the steps below, it explains each steps and fields to create your own prepaid plan as need for your end users.1
Step 1
After you have installed and activated SaaS Business extension, go to Finance Management tab and click on Subscription Plans tab in the list.
2
Step 2
Once you are on the Subscription Plans page, click on the Create New Subscription Plan button on the top right corner.
3
Step 3
Next, you will see following sections:
- General Settings
- Payment Gateways Plan IDs
- Included AI Credits
- Included Features
- Included Extra Service Limits
- Included Extension Features
- Extra
Below is the explanation of each fields, configure as you prefer, you have full flexibility here.
4
Step 4
In the General Settings panel, you can configure following fields:
- Plan Status - you can either have your plan
Active(will be visible for everyone),Hidden(hidder for everyone except for anyone that you made visible explicitly) orClosed(not visible to anyone) - Plan Name - provide a plan name that all the users will see
- Price - set the preferred price, you can set it based on allocated credits
- Currency - set your desired currency
- Payment Frequency - you can create
Monthly(charged on a month basis),Yearly(charged on a yearly basis), orLifetime(charged only once upon subscription)In all 3 payment options, the credits are renewed on a monthly basis - Featured Plan - you can set if you want this plant to be feature or not in the list, it will have highlighted colors vs other subscription plans in the list
- Free Plan - set if you want this plan to be free or not
- Free Plan Days - set for how many days you want make this plan free, after that day, user will be required to pay to continue using the script.
5
Step 5
In the Payment Gateways Plan IDs panel, for the listed payment gateways, you need to include valid 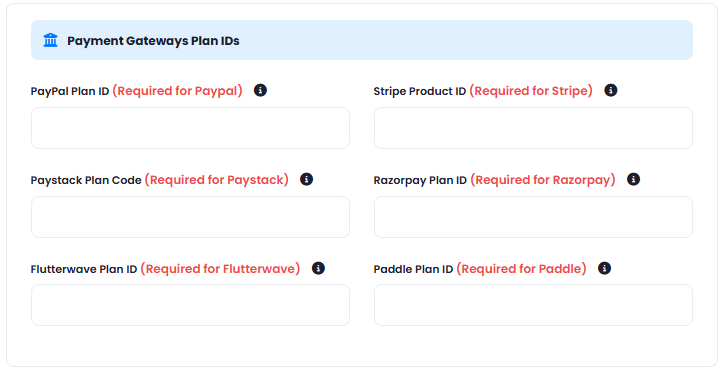
plan ids or product ids which are generated at the payment gateway website, refer to the Payment Gateways in the docs to learn more:- PayPal Plan ID - required for Paypal subscription plan payments
- Stripe Product ID - required for Stripe subscription plan payments
- Paystack Plan Code - required for Paystack subscription plan payments
- Razorpay Plan ID - required for Razorpay subscription plan payments
- Flutterwave Plan ID - required for Flutterwave subscription plan payments
- Paddle Plan ID - required for Paddle subscription plan payments
In the near future we will remove this requirements, but for the moment you will need to include them accordingly.
6
Step 6
In the Included AI Credits panel, you can configure following fields, this are the credits that user actually buys from you which gets renewed every month:
- Word Credits - these are essentially
tokensthat are valid for all Text Generation tasks, hence applicable to all AI features that generate text in Davinci AI - Media Credits - these are credits applicable for
image,video,soundgeneration tasks, cost for each of the image/video/sound vendors you can control directly on the configuration pages of those vendors at this point. - Characters - these are credits for all Text to Speech generation tasks regardless of the TTS vendor.
- Minutes - these are credits for all Speech to Text generation tasks regardless of the STT vendor.
Note that you can fill in any combination of the credit types. You are not required to fill each and every field with credit values, you put
0to all and just fill inWord Creditsfield for example, that way you will be selling only word credits to your users in this particular Subscription Plan.
7
Step 7
In the Included Features panel, here you have full control to which core features provide access in this particular subscription plan for your end users: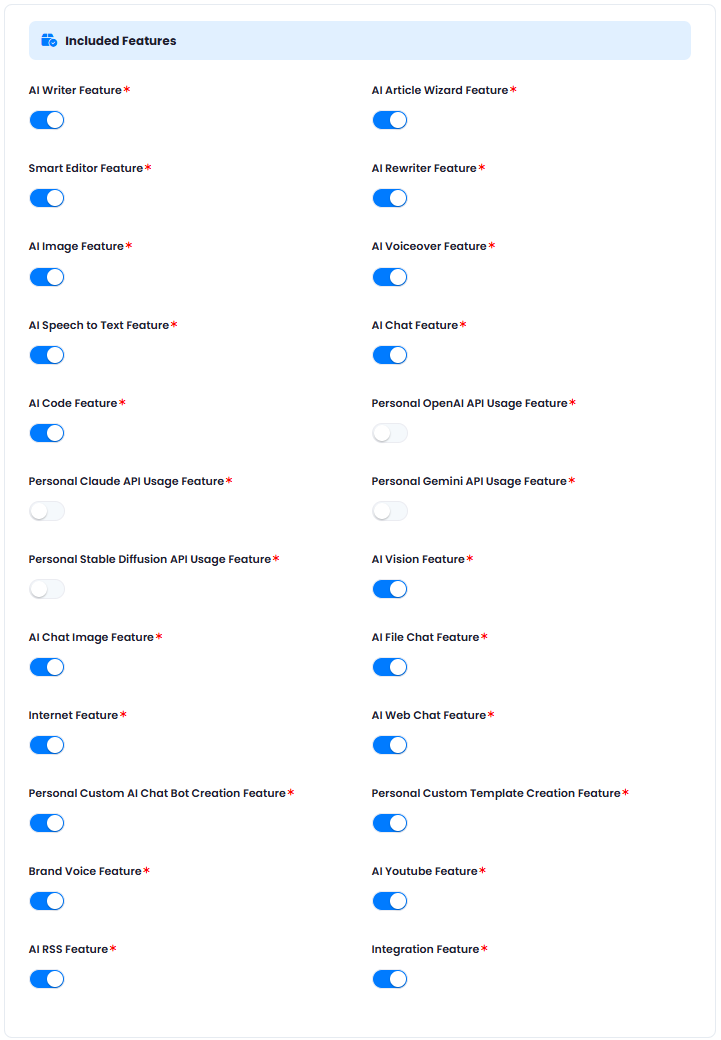
- AI Writer Feature
- AI Article Wizard Feature
- Smart Editor Feature
- AI ReWriter Feature
- AI Image Feature
- AI Voiceover Feature
- AI Speech to Text Feature
- AI Chat Feature
- AI Code Feature
- AI Vision Feature
- AI Chat Image Feature
- AI File Chat Feature
- AI Web Chat Feature
- AI Youtube Feature
- Brand Voice Feature
- Integration Feature - needed if you purchased Wordpress extension
- Personal Custom AI Chat Bot Creation Feature
- Personal Custom Template Creation Feature
- Personal OpenAI API Usage Feature - once enabled, subscriber for this plan will be required to use his own API key for OpenAI
- Personal Claude API Usage Feature - once enabled, subscriber for this plan will be required to use his own API key for Claude
- Personal Gemini API Usage Feature - once enabled, subscriber for this plan will be required to use his own API key for Gemini
- Personal Stable Diffusion API Usage Feature - once enabled, subscriber for this plan will be required to use his own API key for Stable Diffusion
8
Step 8
In the Included Extra Service Limits panel, here you have full control of additional important features and settings: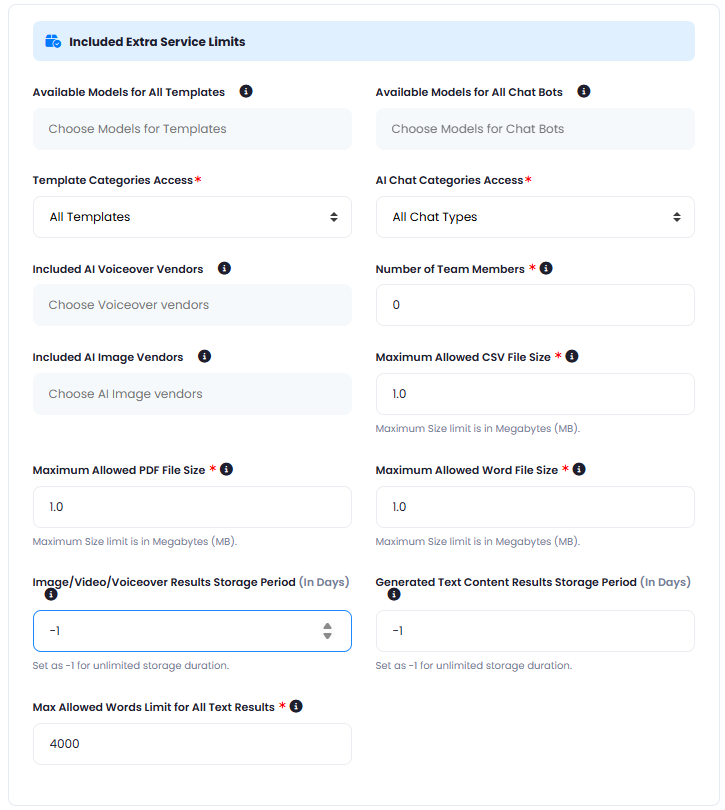
- Available Models for All Templates - you can control which AI models to provide access to for AI Writer feature
- Available Models for All Chat Bots - you can control which AI models to provide access to for AI Chat features
- Template Categories Access - you can control to which template packages you want the subscriber to have access to
- AI Chat Categories Access - you can control to which template packages you want the subscriber to have access to
- Included AI Voiceover Vendors - you can also control which Text to Speech vendors to include in the plan, only the voices of selected TTS vendors will be available for your users
- Included AI Image Vendors - you can also control which Image Generation vendors to include in the plan, only the models of selected vendors will be available for your users
- Number of Team Members - how many user can create
- Maximum Allowed CSV File Size - for AI File Chat feature
- Maximum Allowed PDF File Size - for AI File Chat feature
- Maximum Allowed Word File Size - for AI File Chat feature
- Image/Video/Voiceover Results Storage Period (In Days)
- Generated Text Content Results Storage Period (In Days)
- Max Allowed Words Limit for All Text Results
9
Step 9
In the Included Extension Features panel, here you have all the extension that you have purchased via the Marketplace in Admin Panel, the list of extensions are growing with every update, and you will only see the extension that you have purchased, rest will not be visible for you: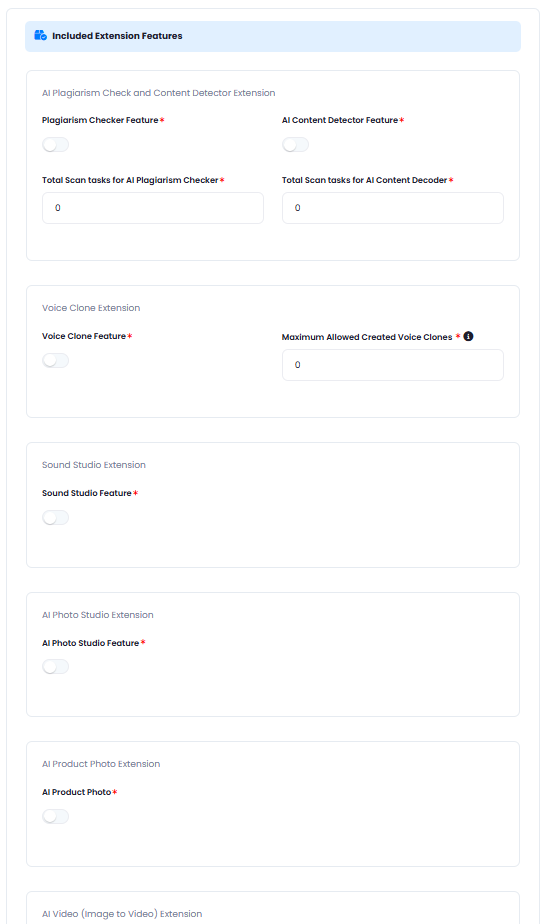
- AI Plagiarism Check and Content Detector Extension
- Voice Clone Extension
- Sound Studio Extension
- AI Photo Studio Extension
- AI Product Photo Extension
- AI Video (Image to Video) Extension
- AI Video (Text to Video) Extension
- AI Video (Video to Video) Extension
- Wordpress Integration Extension
- AI Avatar Extension
- AI Voice Isolator
- Faceswap Extension
- AI Music Extension
- SEO Tool Extension
- AI Social Media Extension
- Chat Share Extension
- AI Textract Extension
- AI Realtime Voice Chat Extension
- AI External Chatbot Extension
- Speech to Text Pro Extension
10
Step 10
In the Extra (Optional) section, you can enter additional feature descriptions which will be listed for the user in Subscription Plan details section.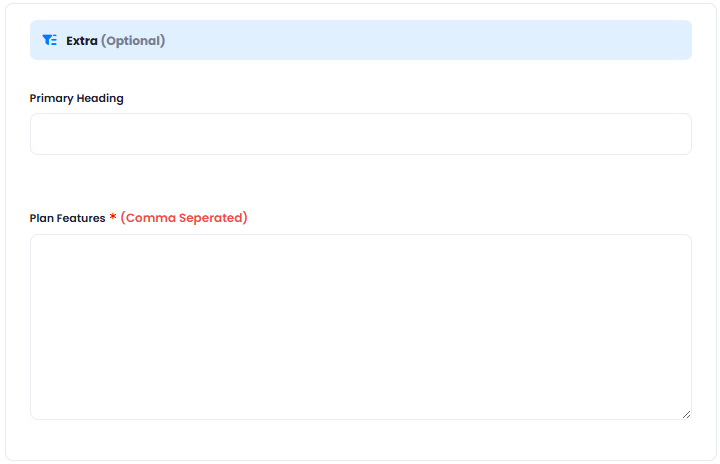
11
Step 11
After you are done with filling in all the fields you prefer, click on the Create button.
12
Step 12
User will be able to see your newly created subscription plan under Subscription Plans in the User Panel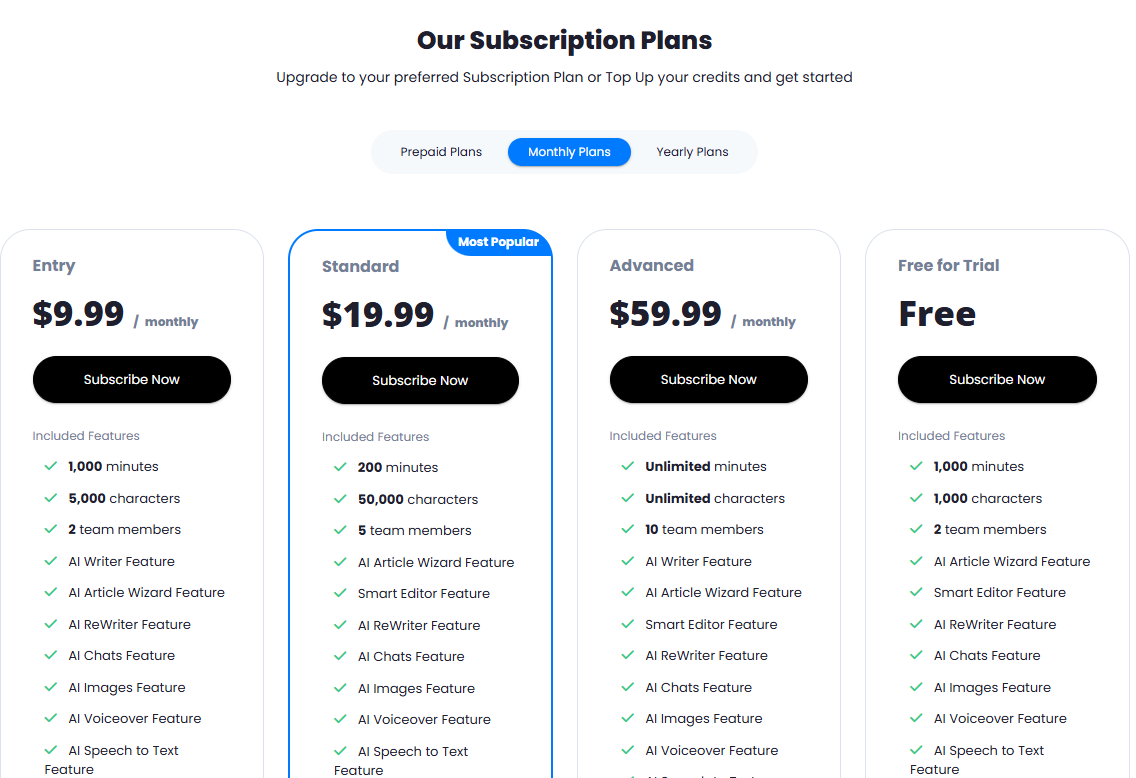
Congratulations! You now have completed creating your first Subscription Plan.