Extension Configuration
To be able to use Sound Studio feature, follow these steps to setup this extension.1
Step 1
Go to the Marketplace in Admin Panel and install Sound Studio extension after successfully purchasing it first.
2
Step 2
After installation is completed, go to AI Settings page in Admin Panel and click on Extensions tab there. Click on Sound Studio there.
3
Step 3
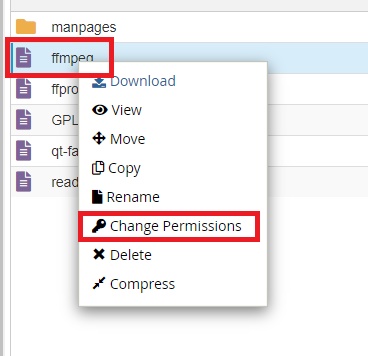
Make sure you have setup ffmpeg during the installation of the script, if not, then please follow these steps.
- Go to your hosting platform, and to the main folder where you have installed the script.
- Find the vendor folder in the root directory of your documentation
- Find the ffmpeg folder within the vendor folder.
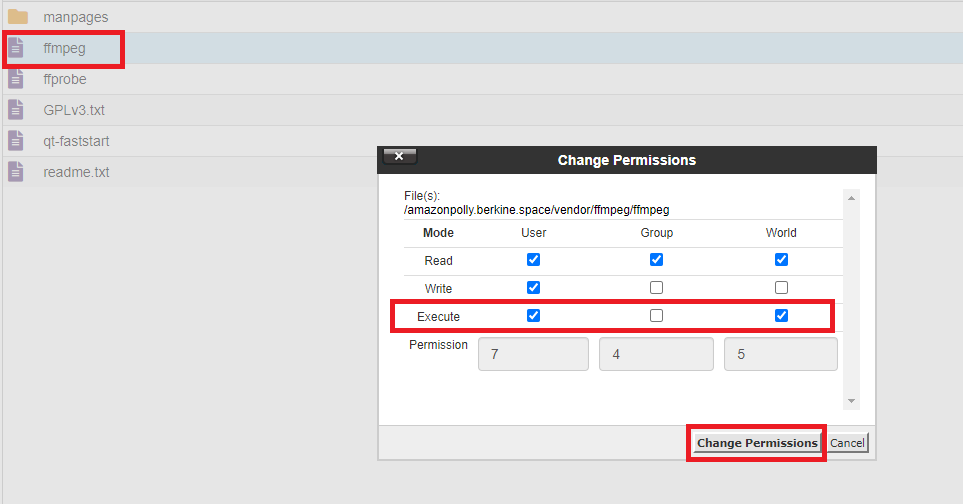
- Change file permission of ffmpeg to be executable by anyone as shown in below
4
Step 4
To control the settings of Sound Studio exension, return to AI Settings page in Admin Panel and click on the Extensions tab, and select Sound Studio extension.
From there you have full control of this extension for all users.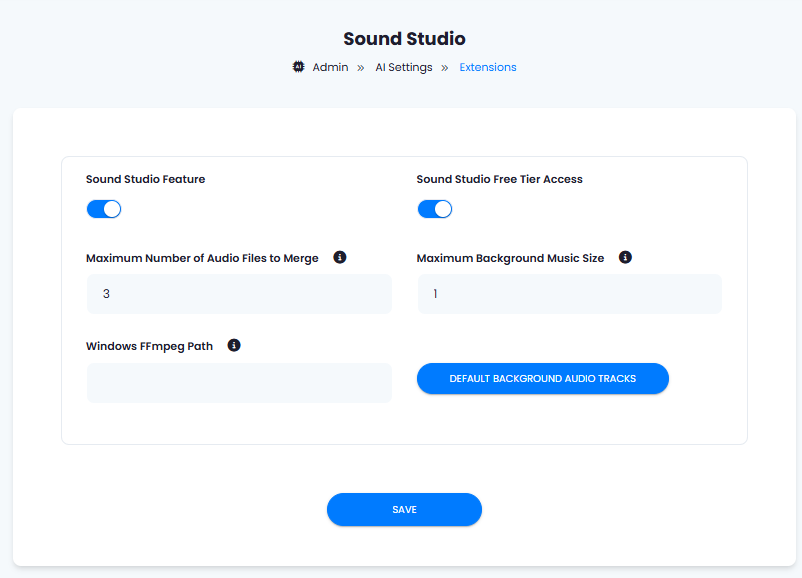
- Turn on the checkboxes for Sound Studio Feature and Sound Studio Free Tier Access
If you don’t turn on Sound Studio Free Tier Access, then users who did not subscribe to any subscription plan where you have Sound Studio feature enabled, will not have any access to this feature
- The Maximum Number of Audio Files to Merge field allows to control how many audio files user is allowed to merge
- The Maximum Background Music Size field allows you to set limit on the background audio files sizes that user can upload
- The Windows FFmpeg Path is needed only if you want to run on a Windows localhost environment, you can ignore it if you will be running it on a public hosting platforms.
- The Default Background Audio Tracks button, let’s you upload background audio files that will be visible and available to all users by default.
- After you are done with configuration, click the Save button.
5
Step 5
You know have completed the Sound Studio extension configuration. Proceed to the section below on how to use it.
You have successfully comleted the setup process of this extension.
How to Use
After you are done with the configuration of Sound Studio feature, it will appear on the User panel there you can start using this extension.Merging results of AI Voiceover
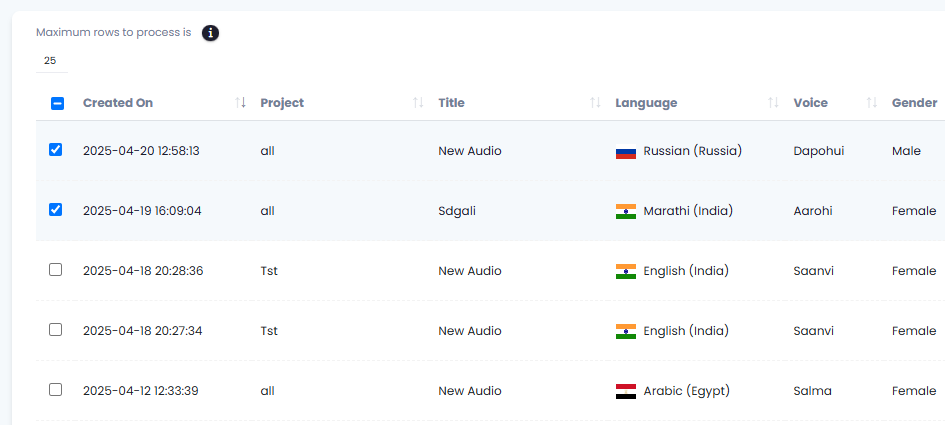
You can merge results of AI Voiceover based on the limits set by Admin in the Sound Studio settings.- To merge results of AI Voiceover, select which rows you want to merge by simply selecting the row.
- You can also grag and drop to rows above or below each other, the one on the top will be the first one in the final result followed by the next one and so one in their respective order in the table.
- All merged results in Sound Studio are listed under Sound Studio Results table on the Sound Studio page.
Add Background Audio to final result
During the merge of AI Voiceover results, you can add custom background music and control background audio volume as needed.- Select your background audio from the Select Backround Music list, or upload your own via Upload Music File section on the right.

- After you have selected your target audio files and selected your background audio, click on the Merge Audio Files button, and it will produce a combined output in a single audio file which will be listed under Sound Studio Results table below.