Introduction
Davinci AI’s allows you to integrate cloud storages to store results of various media related features of the script. This allows you to make sure that you always have sufficent storage space for your customers. Using cloud storage option also minimizes the latency for your user to access their media results as data could be avaiable via CDN framework of the cloud vendors.Connect Wasabi Account
To be able to use your Wasabi account, follow these steps to setup integration.1
Step 1
If you don’t have a Wasabi account, sign up here
2
Step 2
Once you are logged into your Wasabi Account, select Buckets under Data Access menu panel and click Create Bukcet
3
Step 3
Prorive a unique Bucket Name and select your Region and click Create Bucket. Make a note of both them, you will be including them into the script at the last step.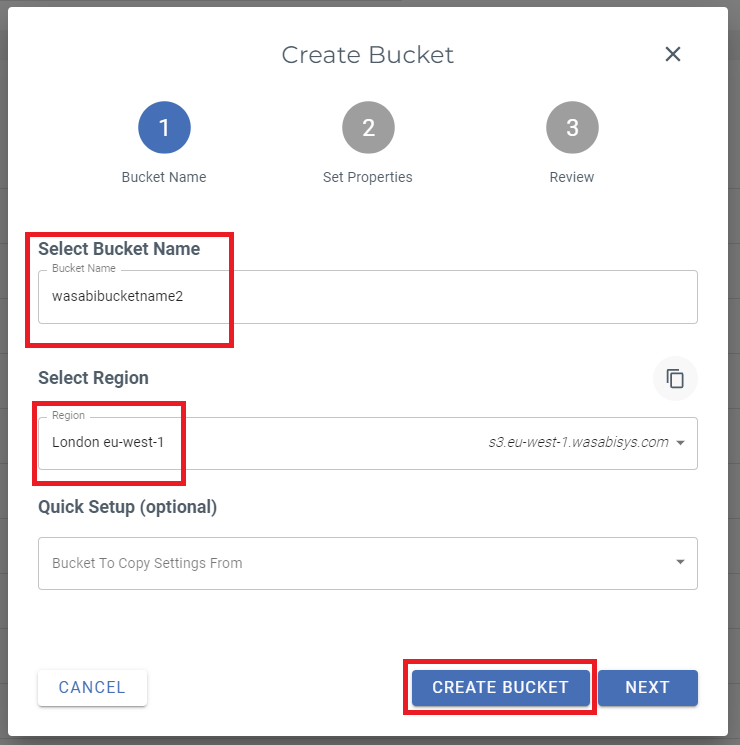
4
Step 4
After the bucket is created, select your bucket from the list and under Actions tab, click on Settings.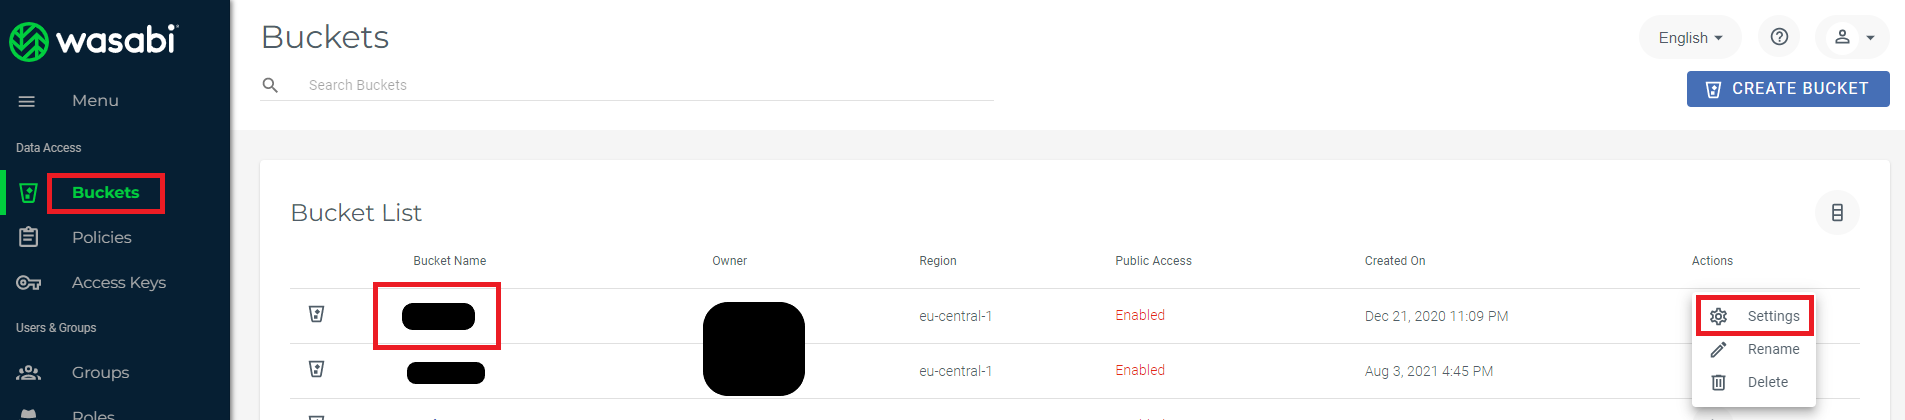
5
Step 5
In the Settings page, make sure you Enable Public Access for this bucket.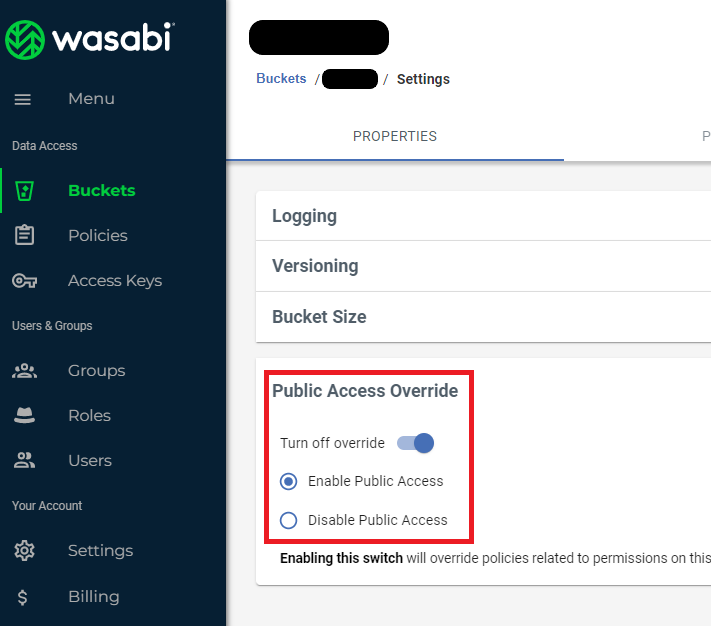
6
Step 6
Now when you are done creating and configuring your Wasabi Bucket, you will need to create Access Keys to be able to use your Wasabi Account.
Go to Access Keys under Data Access menu panel and click on Create New Access Key.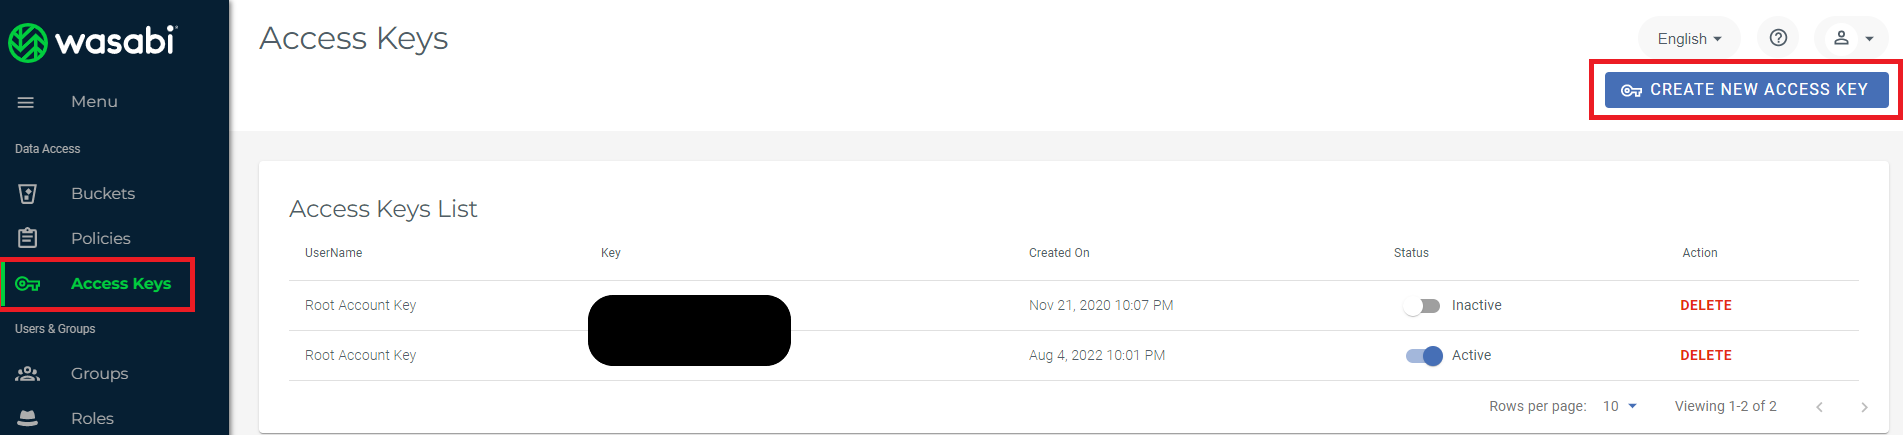
Go to Access Keys under Data Access menu panel and click on Create New Access Key.
7
Step 7
Click Create button and Download or Copy your keys immediate as you get to see your Secret Access key only once.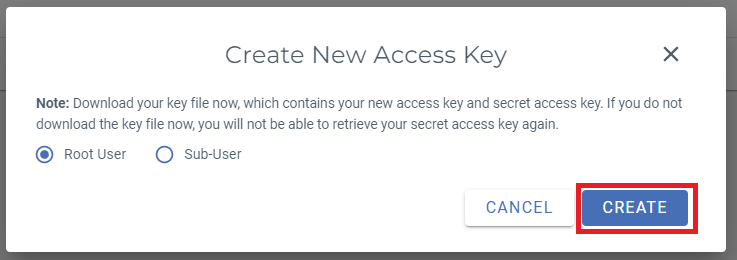
8
Step 8
Login to Davinci AI using your admin credentials.
9
Step 9
In Admin Panel, navigate to AI Settings -> AI API Keys tab.
10
Step 10
Click on Wasabi tab there.
11
Step 10
Fill in following required input field:
- Wasabi Access Key
- Wasabi Secret Access Key
- Wasabi Bucket Name
- Set Wasabi Region
12
Step 12
After you are done with configurations, click on Save button.
Congratulations! You have successfully comleted the Wasabi setup process.
Davinci AI Tools which supports storing results in Wasabi
Following AI tools can be store results in Wasabi Cloud StorageSupport for more AI tools will be added soon, we are actively working on that
- AI Voiceover
- AI Images
- AI Speech to Text
Via AI Settings page in Admin Panel, you can set default cloud storage vendor for each of the supported AI tools individually