Introduction
Localization is a crucial feature that allows you to make Davinci AI accessible to a global audience. This guide will walk you through the process of translating your Davinci AI, managing language files, and enabling language selection for your users.How to Translate
Davinci AI usesjson files per language, which are stored under /lang directory in the root folder of your domain with their respective country codes. Example en.json for English language.
1
Overview
Go to Admin Panel -> General Settings -> Languages page to access the Language Manager feature.
2
Add New Language
To add a new language, select your language as needed from the Add New Language section and click on Add button.
3
Installed Languages
All added languages by you will be listed in the Installed Language section.
Use the checkboxes to activate or deactivate installed languages, it will save your checkbox changes automatically.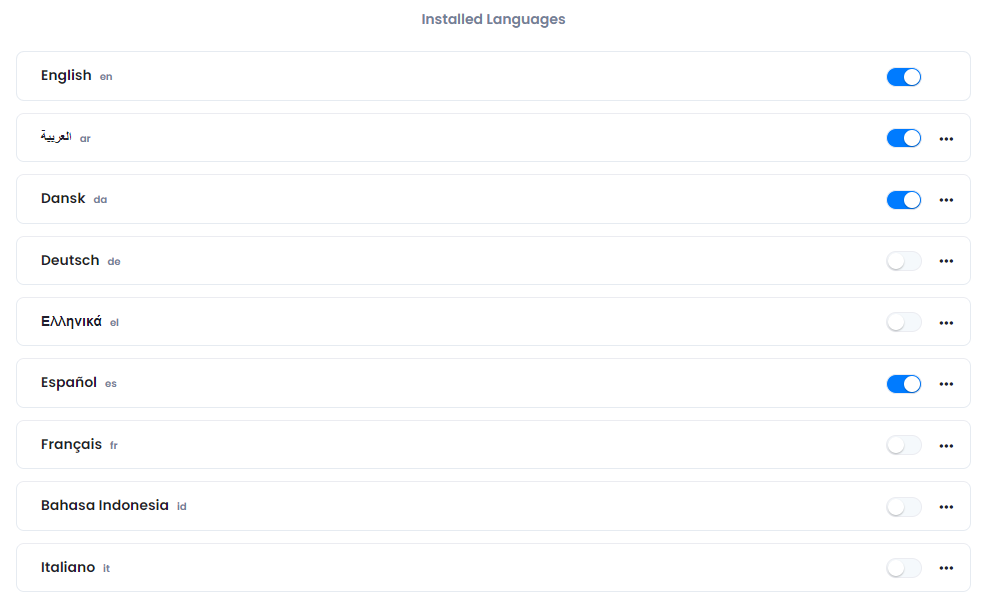
Use the checkboxes to activate or deactivate installed languages, it will save your checkbox changes automatically.
User will see only activated languages from the list
4
Set Default Language
To set default language, select your target language as needed from the Default Language section and click on Set button.
Note that this list will show only the languages which were enabled in the Installed Languages section, refresh your page if you don’t see newly added or enabled languages in the dropdown list.
Note that this list will show only the languages which were enabled in the Installed Languages section, refresh your page if you don’t see newly added or enabled languages in the dropdown list.
5
Generate All JSON Files
You can genereate JSON files for all languages listed in the Installed Languages section with just one click regardless if some of the languages are enabled there or not via Publish All JSON Files button.

6
Synchronize Your JSON files and Main (English) JSON Files
This is one of the important features of the Language Manager. It can do 2 things:
- As it is not efficient to translate every line individually, most people will simply translate genereated JSON files via various online tools that are avaialble out there. So if you have your language JSON file, simply include it in the
langfolder in the root directory of your domain, make sure that your language is listed in the Installed Languages list and activated, afterwards click on Reinstall Language Files button. This will synchronize all your translations in your updated json files with the database of the script. - As the script is rapidly growing, the main lang/en.json file is regularly updated with almost every update, so make sure to click on Reinstall Language Files button if you see in the changelogs that new words were added statement, it will automaically add new strings into all exisitng json files in the lang folder without overwriting existing contents, and the end of the list you will see new strings added for you that you can simply translate manually (as explained in step 6) and save as the added list per update is usually small.
7
Translate Individual Strings
You can also generate individual language json file and/or translate directly strings by clicking on the target language menu button under Installed Language section, and select either Edit Strings to translate strings individually or Generate JSON file which will generate a JSON file only for this language, which you can use to translate on variou online json translator platforms like this paid json translator platform.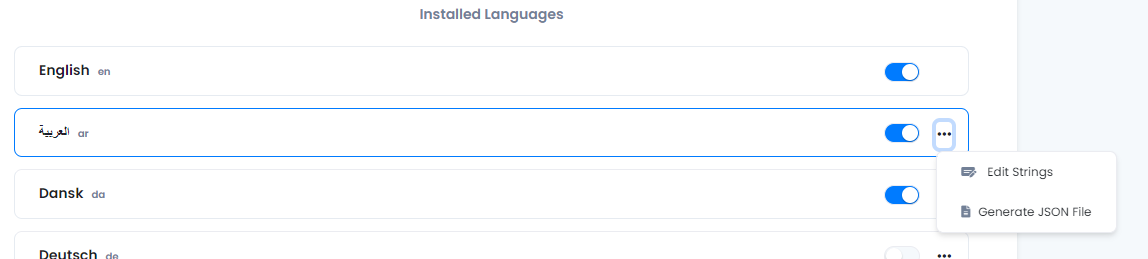
8
Add New Custom Strings via Language Manager
9
Final
You know have completed the Language Manager configuration.