> ## Documentation Index
> Fetch the complete documentation index at: https://davinci.mintlify.site/llms.txt
> Use this file to discover all available pages before exploring further.
# Google Login Auth
> Let your users to login and register using their own Google accounts for simplicity
## Introduction
Davinci AI provides you a solution to let your users login using multiple different social media accounts that they use on a daily basis.
## Configure Google
To let users to login and register using their Google accounts, follow the steps below:
Visit [Google API Console](https://console.developers.google.com/) page.
Once you are logged in your Google console, create a **new project** or use your existing one.
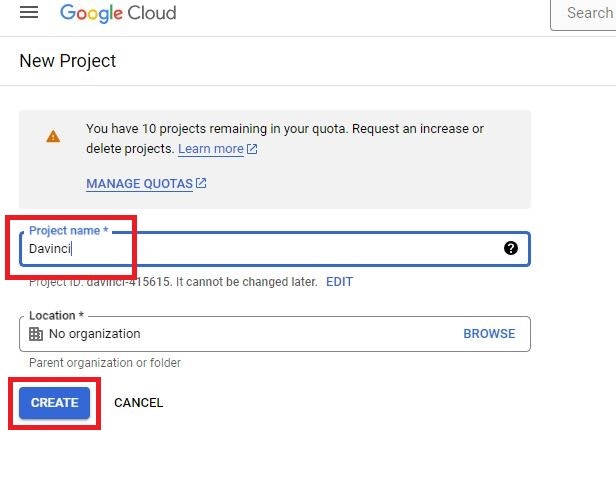
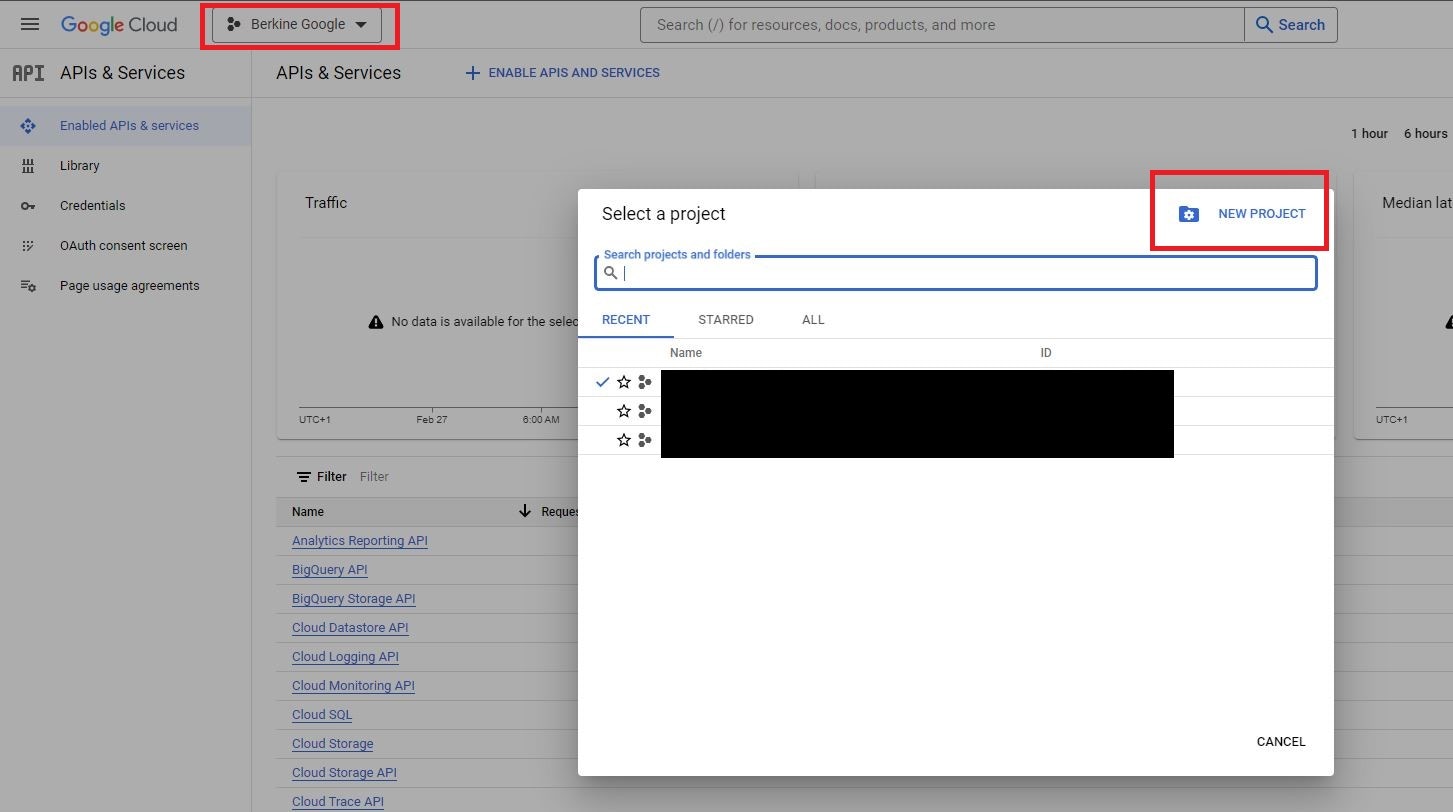 If you are creating a new project, provide a **Project name** and click save.
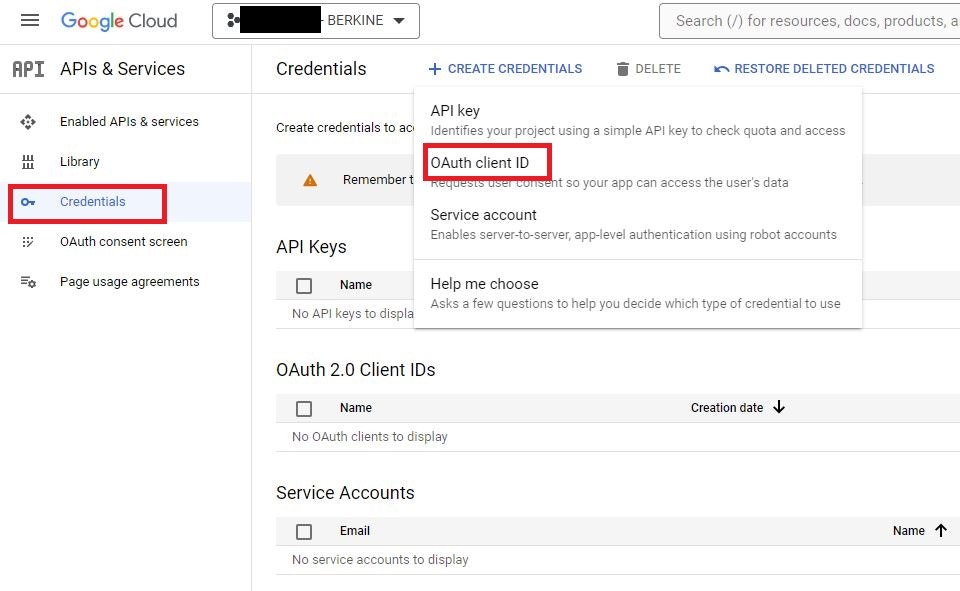
 Next, click **Credentials** on the side menu then **Create Credentials** -> **OAuth client ID**.
 Click on **configure** button.
 On the OAuth Concent screen click **External** and click next afterwards provide all required informaiton there.
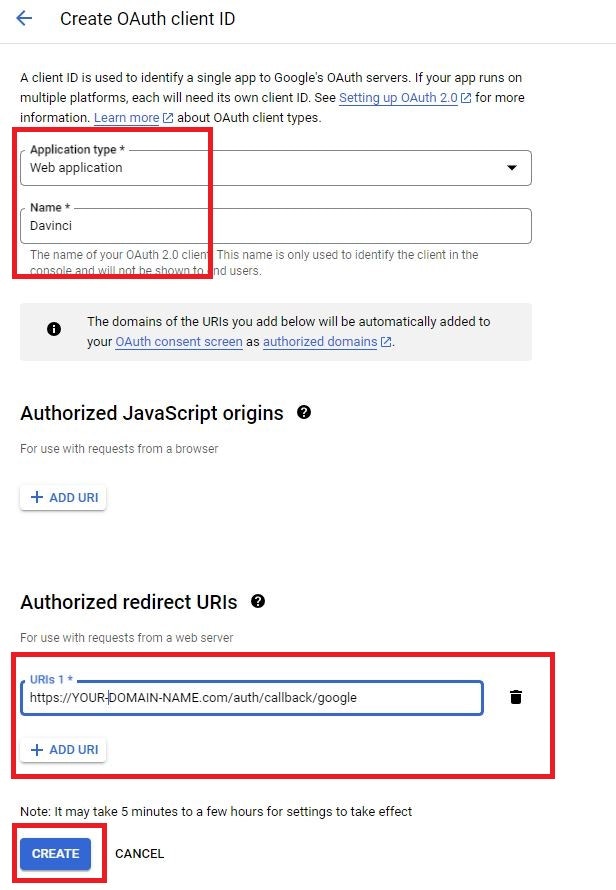
Fill in the required fields as needed, and replace **YOUR-DOMAIN-NAME.com** with your domain and make sure that there are no typos in any of the inputs, click create afterwards.
On the OAuth Concent screen click **External** and click next afterwards provide all required informaiton there.
Fill in the required fields as needed, and replace **YOUR-DOMAIN-NAME.com** with your domain and make sure that there are no typos in any of the inputs, click create afterwards.
 Copy the provided **Client ID** and **Client Secret** somewhere.
Go to **Admin Panel** -> **General Settings** -> **Auth Settings** page, this is where you configure all social media login accounts and settings.
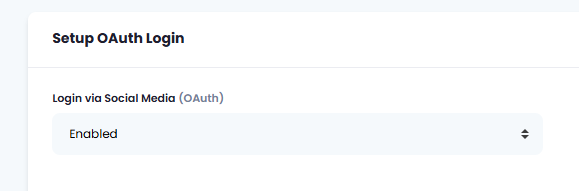
1. First, enable **Login via Social Media** (OAuth)
Copy the provided **Client ID** and **Client Secret** somewhere.
Go to **Admin Panel** -> **General Settings** -> **Auth Settings** page, this is where you configure all social media login accounts and settings.
1. First, enable **Login via Social Media** (OAuth)
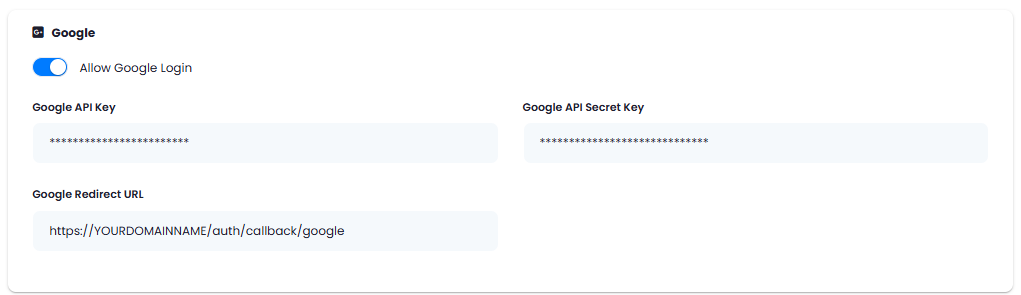
 2. Next, include your Google API keys and enter your domain name there as well if it not shown already for you.
 After you are done with configurations, click on **Save** button.
Congratulations! You have successfully comleted the Login and Registration with Google process.
After you are done with configurations, click on **Save** button.
Congratulations! You have successfully comleted the Login and Registration with Google process.